This post is sponsored by ThermOWeb and contains affiliate links. As part of the Vintage Home Sewing blog tour, I was provided a free copy of the book. The opinions expressed in this post are all mine.

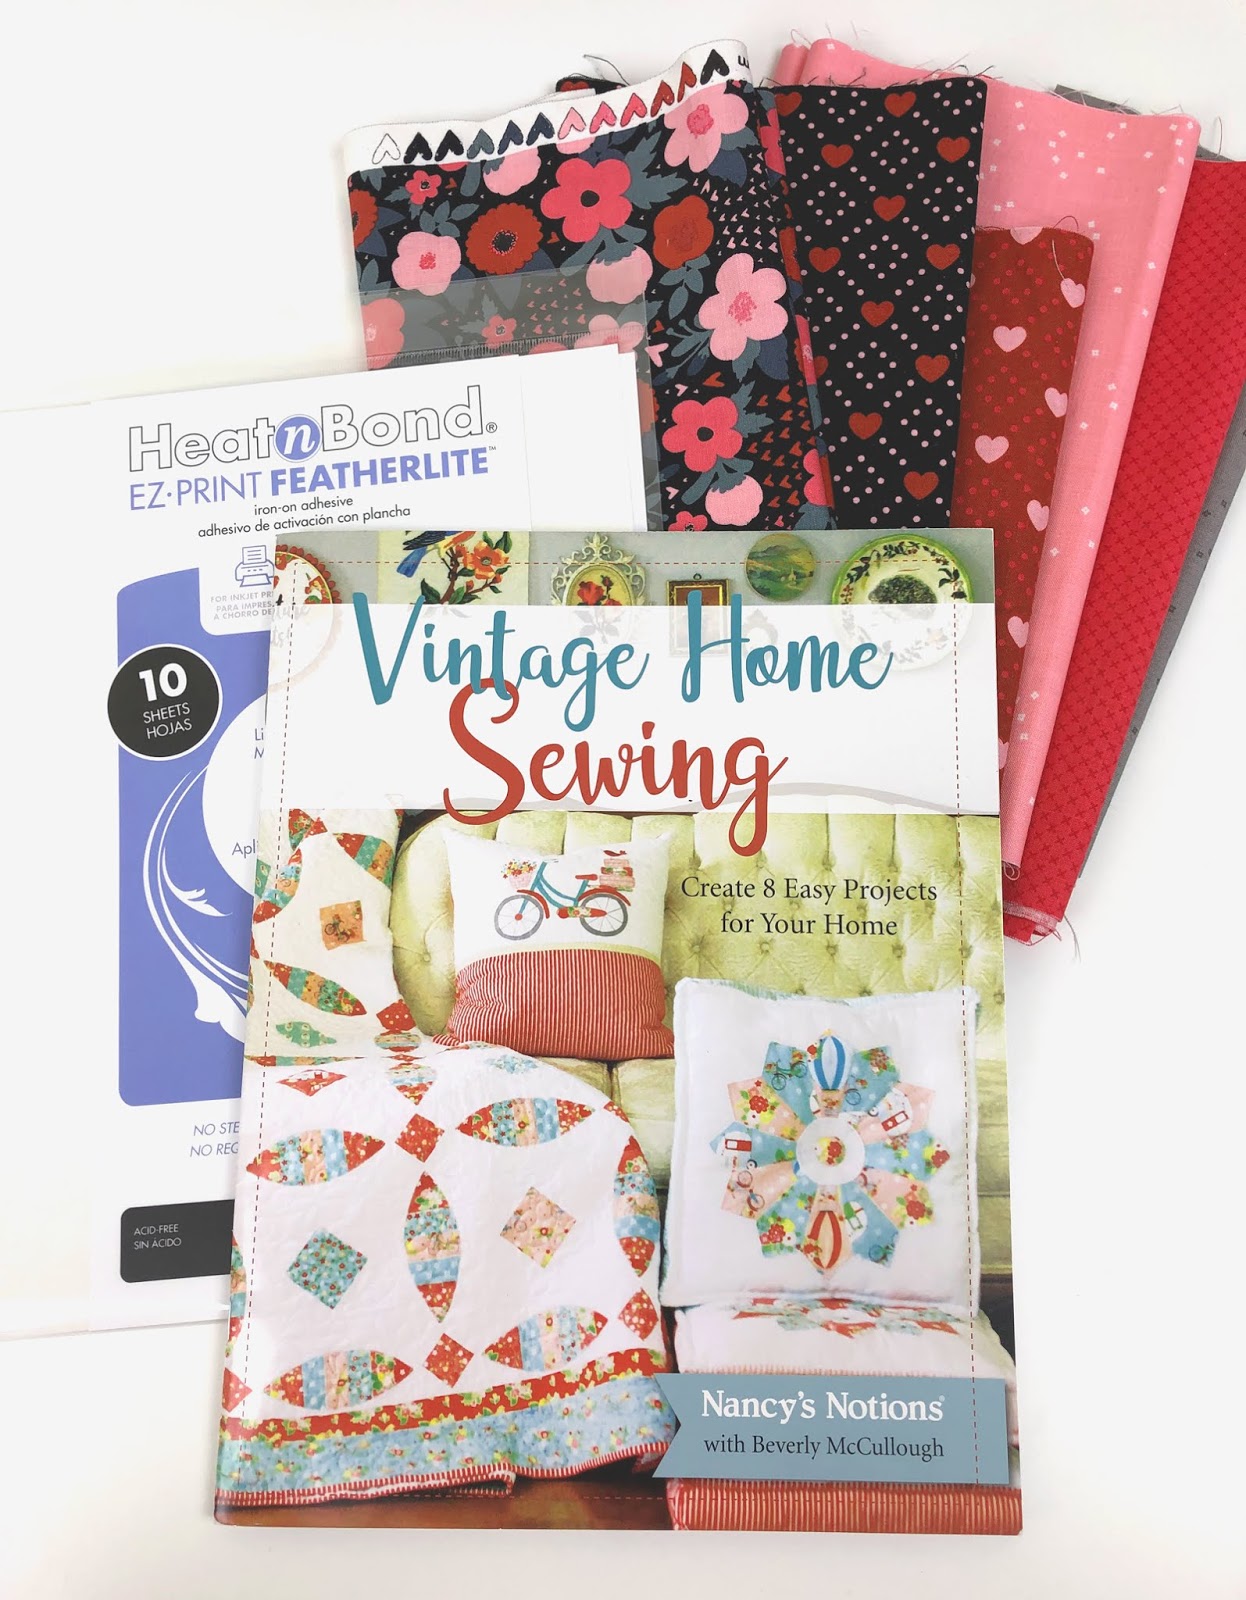
I am so excited to share with you my Valentine version of the Embroidered Bicycle Pillow found in the book Vintage Home Sewing by Bev McCullough of Flamingo Toes. This book, published by Nancy’s Notions is full of fun projects- I can’t wait to make the boxed pouch!! This 18″ pillow is a fun addition to your home decor and can be made up in different colors to match the feel of your home. I decided to make mine seasonal by adding love notes and hearts in the basket of the bike. I just love how it looks! I’m going to share with you my tips and tricks for putting together your own pillow! These tips are helpful even if you aren’t making this specific pillow and just want some help successfully creating embroidered applique pieces. And if you like to watch videos instead of reading- you can watch the full video tutorial on my YouTube channel.
Let’s get started!!
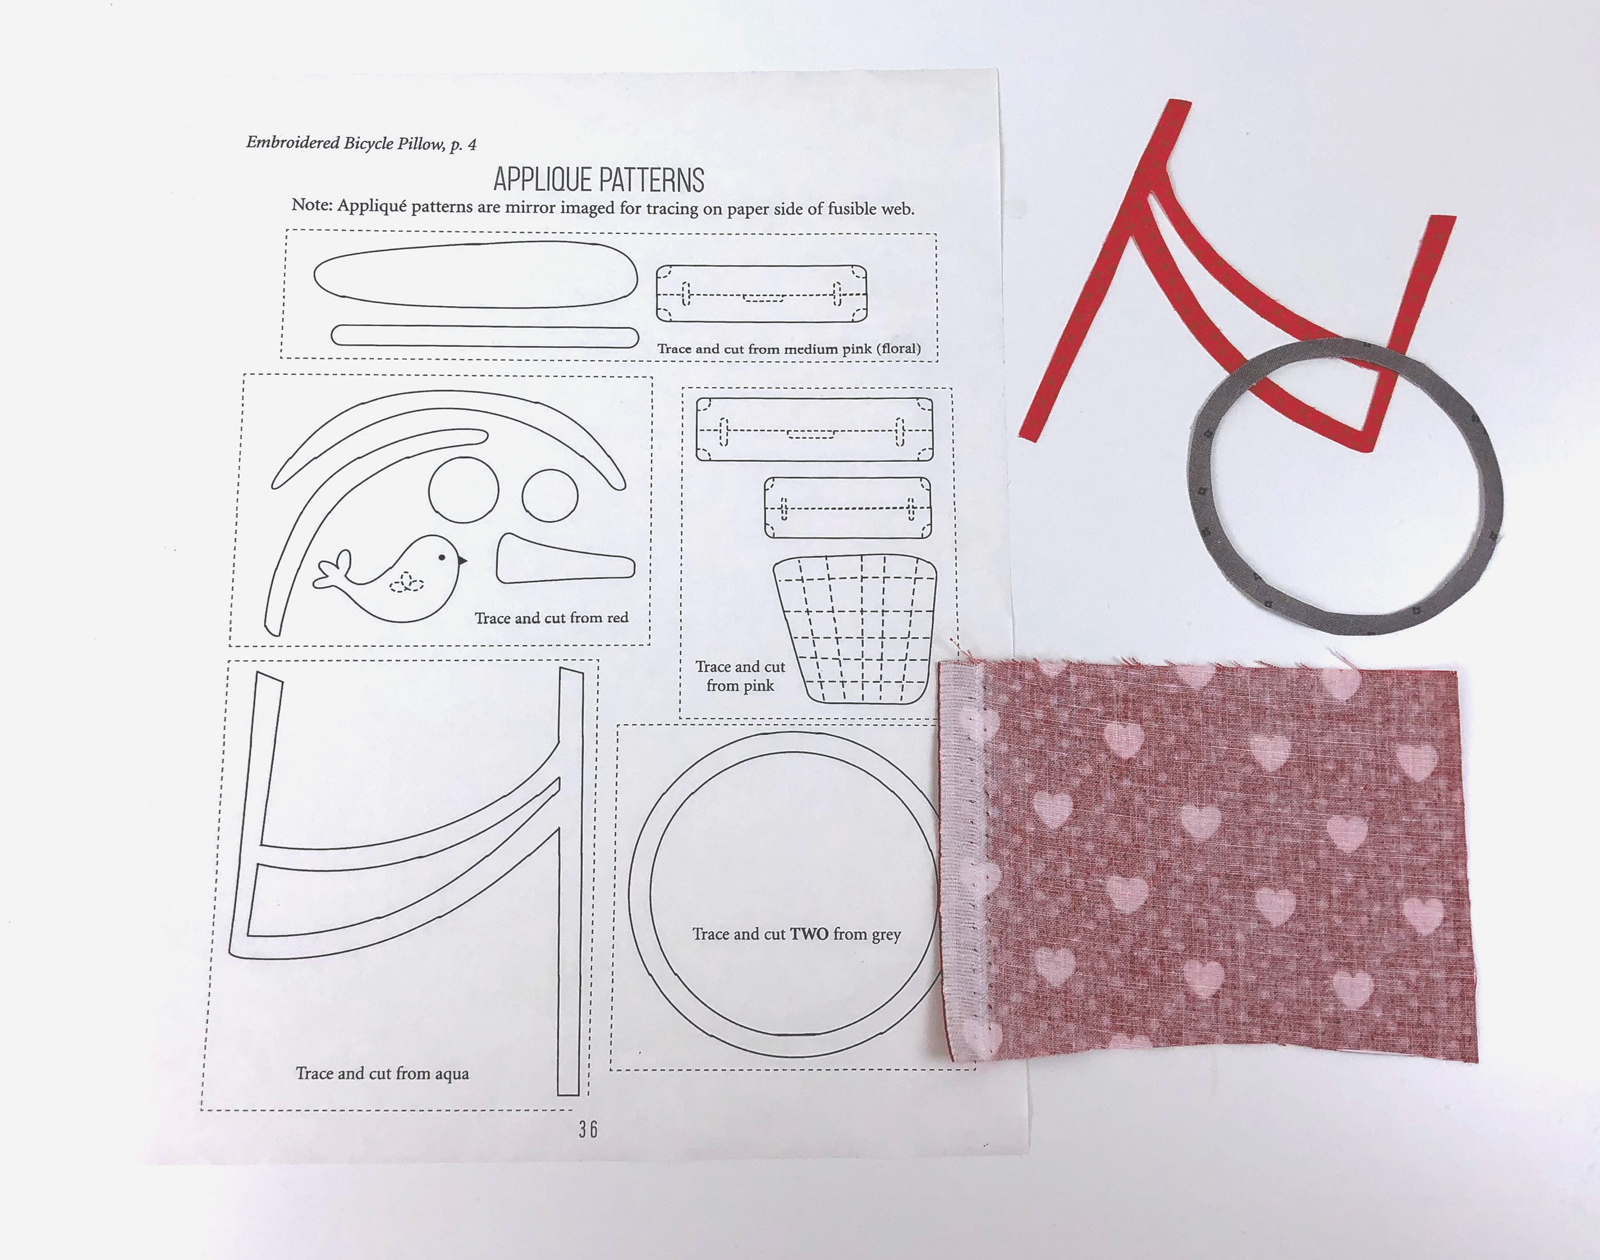
- Obviously you will need your applique pattern to start. If your pattern isn’t a mirror image of the final design, you will need to print it off in mirror image. The pattern pieces in the book are already reversed for you. *One note about the cutting directions in the book- if you follow the cutting directions for the pillow front as outlined, you will end up with a pillow front that is 17″ tall by 18″ wide- to account for the extra 1″ you need- adjust the cutting measurements of the bottom fabric by adding 1″ to the height. OR you may choose to cut down the width of your pillow front and make a 16″ pillow cover instead.
- You will also need fabric. I am using Hello Sweetheart fabric by Riley Blake Designs for this project, as well as some kisses and blossoms basics.
- Embroidery floss- which you should coordinate with your chosen fabrics.
- Finally, you will need your adhesive. I use HeatnBond. I like to use the EZ Print sheets for a project like this because I can just put the pattern on my printer and have it copy the pattern right onto the sheet- no tracing required! (actually there is a tiny bit of tracing because you need 2 wheels, and I didn’t want to use a whole other sheet just for the second wheel- I keep scraps of HeatNBond just for this purpose) You can use either HeatNBond Lite or Featherlite. Featherlite is just a bit thinner adhesive and since there are a few places where there are two or more layers on top of each other, I went ahead and used that, but Lite would work just as well.
- To finish your pillow front you will also need fusible fleece or basting spray and sew in fleece.
- If you would like to embellish your pillow with felt love notes and hearts like I did, you will also need scraps of felt and the pattern pieces. I find it easiest to transfer patterns to felt using freezer paper, so you may also want scraps of that.
Some tools you may find helpful:
A Cricut BrightPad or some other light box
An EasyPress2– but if you don’t have one, your iron will work wonderfully! I prefer the EasyPress2 because the HeatNBond requires you use NO steam and my iron often steams, even if the feature is turned off. I also like the larger, evenly heated surface of the EasyPress2 as well as the timer feature which helps me make sure I am giving the applique pieces enough time and heat to properly bond.
- Cut out your individual sections of applique pattern pieces.
- Adhere the sections to the wrong side of the corresponding fabrics. Use your iron or EasyPress2 for this and follow the package directions.
- Cut out all your individual applique pieces.

- Now it’s time to start assembling your applique. But first, I wanted to make sure I was placing my bicycle in the right place on the background fabric. To do this I made a copy of the applique layout guide so I could draw some guide lines on it.
- First I marked a line 1″ below the tires, so I would know where to line up my fabric.
- Next, I found the center of the bike and marked a line on my first line so I would be able to center the applique on the background fabric.
- Place your layout guide on the light box if you are using one.

- Fold your background fabric in half along the length and pinch a small crease on the bottom edge at the center.
- Line up this crease with the center mark on your line.
- Make sure the fabric is lined up with your guide that is 1″ from the tires.
- Working from the back to the front, peel off the paper backing from your applique pieces and lay them on the guide in their respective places. I find it helpful to place a couple of pieces, take the applique to the iron, adhere the glue and then go back and place few more. This is where the BrightPad comes in handy, with its thin profile it’s easy to carry back and forth from my work surface to my pressing surface and back again.
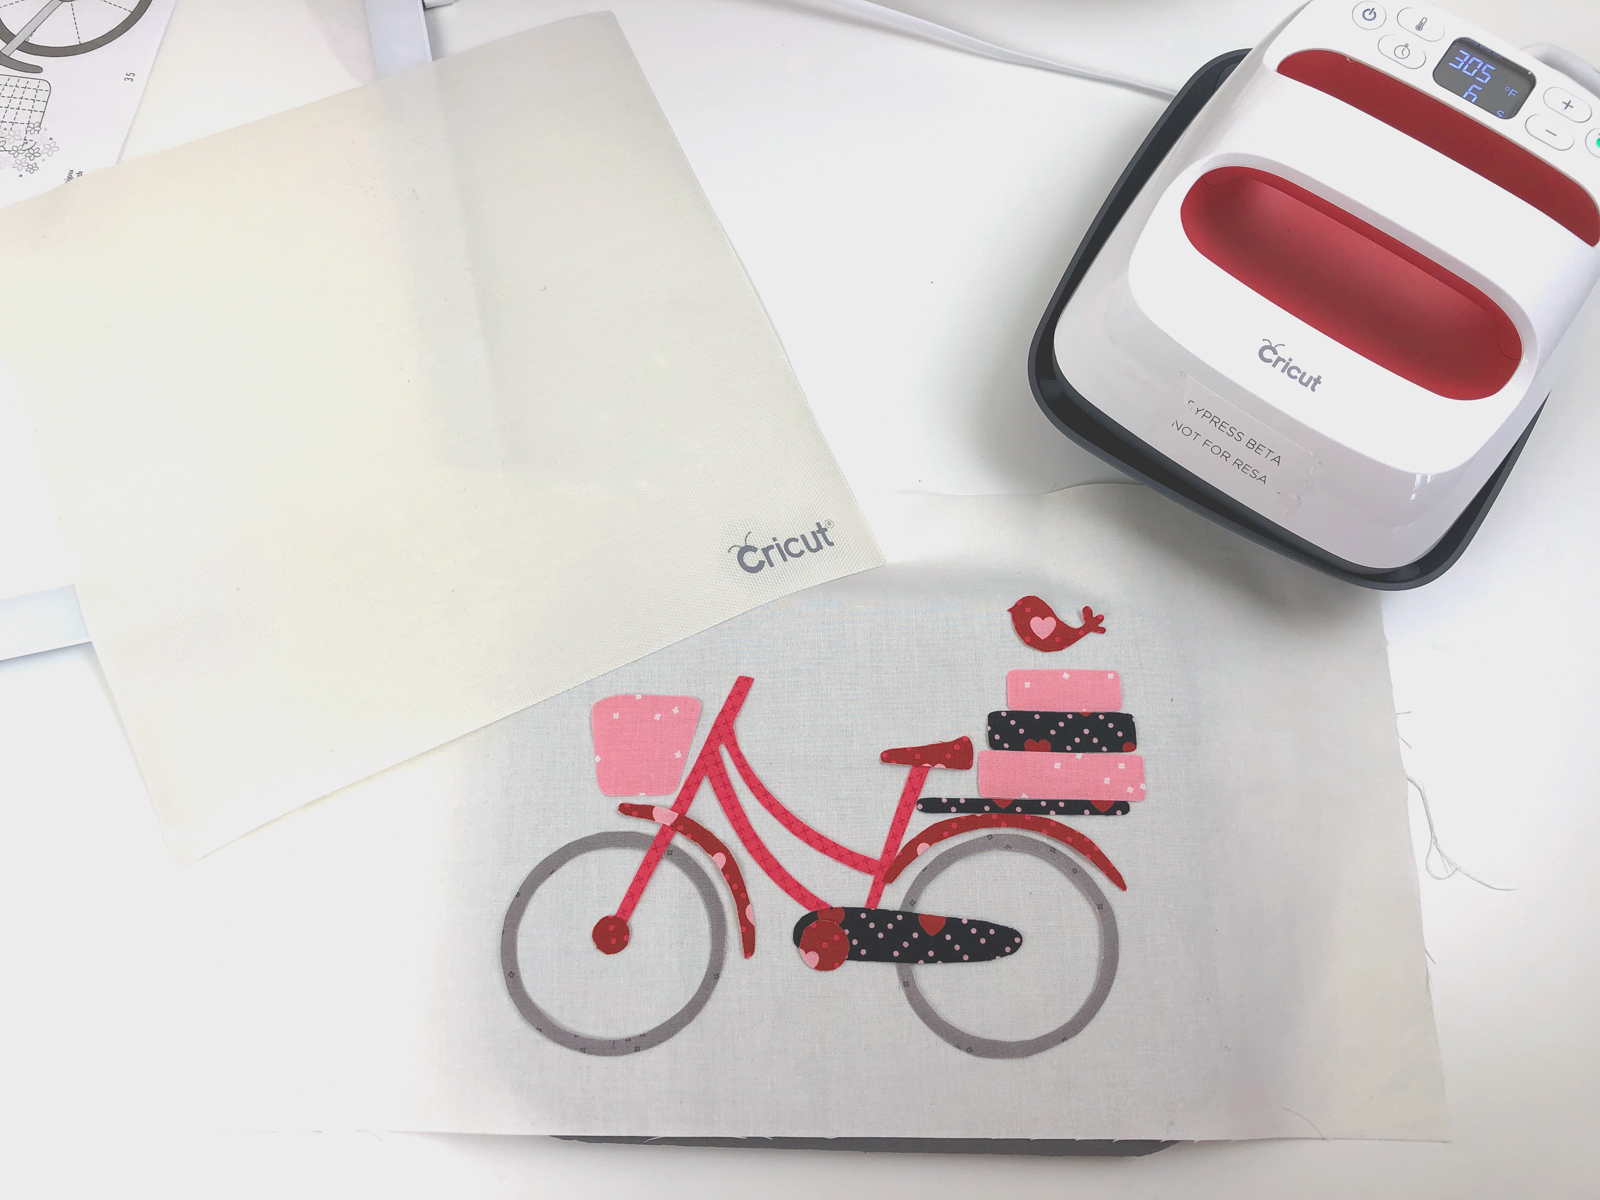
- I just slide the applique off of the BrightPad and onto my EasyPress mat. Then follow the package instructions for the HeatNBond to adhere the applique pieces. *one note- in doing a bit of research, I found that a medium iron is approx. 305* so that is the temperature I set my EasyPress to when doing applique requiring a medium iron setting.
- After the applique is assembled and fused, transfer the guides for the stitching on the bicycle- the spokes of the tires, handlebars, etc. If the fabric is too dark or thick to see the pattern from the layout guide, I just approximate them as best I can. I use either a Frixon pen or water soluble marking pen for this.
- Take your applique to your sewing machine and stitch around all the applique pieces. I also use my machine to add the details to the bike, such as the tire spokes, and details on the luggage.
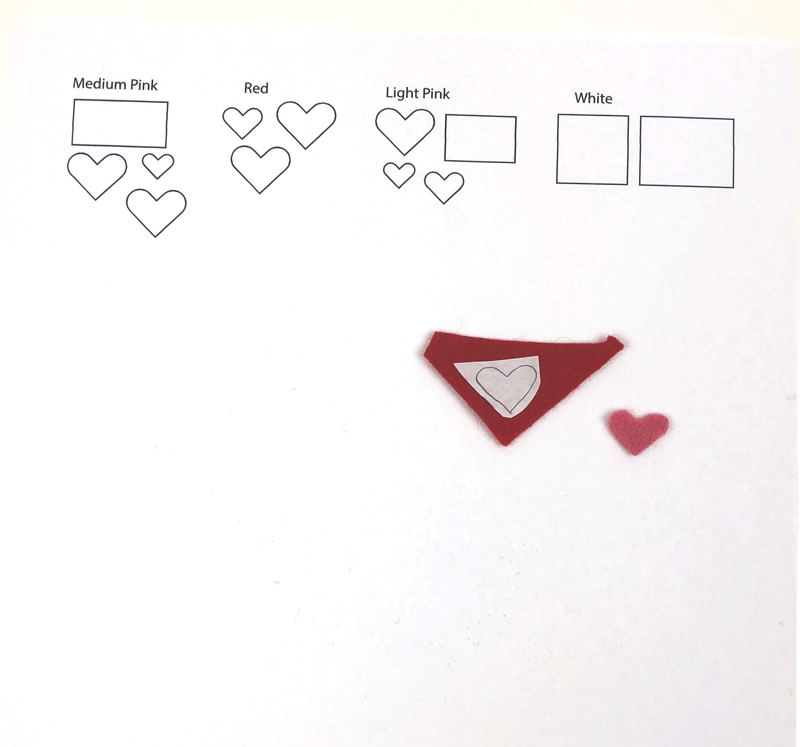
- Now that all the machine stitching is done, it is time to prepare your felt pieces. (assuming you are doing them- otherwise follow the pattern instructions for adding the embroidered flowers)
- Trace the patterns onto the paper side of freezer paper.
- Cut out around the shapes.
- Use a hot, dry iron to attach the freezer paper to the felt- it only takes 1-2 seconds of heat to do this.
- Cut out all your felt shapes.

- I like to put the basket of the bike into an embroidery hoop to make stitching the felt shapes on easier, but this is optional.
- Use 1 strand of black floss to outline all of the envelopes. I stitch them on one at a time.
- Add the heart seals on the envelopes using 2-3 strands of floss in a contrasting color. Use 2 lazy daisy stitches with the bottoms touching to create the hearts.
- Stitch on the felt hearts using 1 strand of a coordinating color of floss.
- Use your black floss to add the eye and wing details to your bird.

Now all that is left is to finish your pillow. You can create an envelope closure as suggested in the book, or you can add a hidden zipper closure, which is what I chose to do. Set out your new pillow and just feel the LOVE!
xoxo,
Amy


