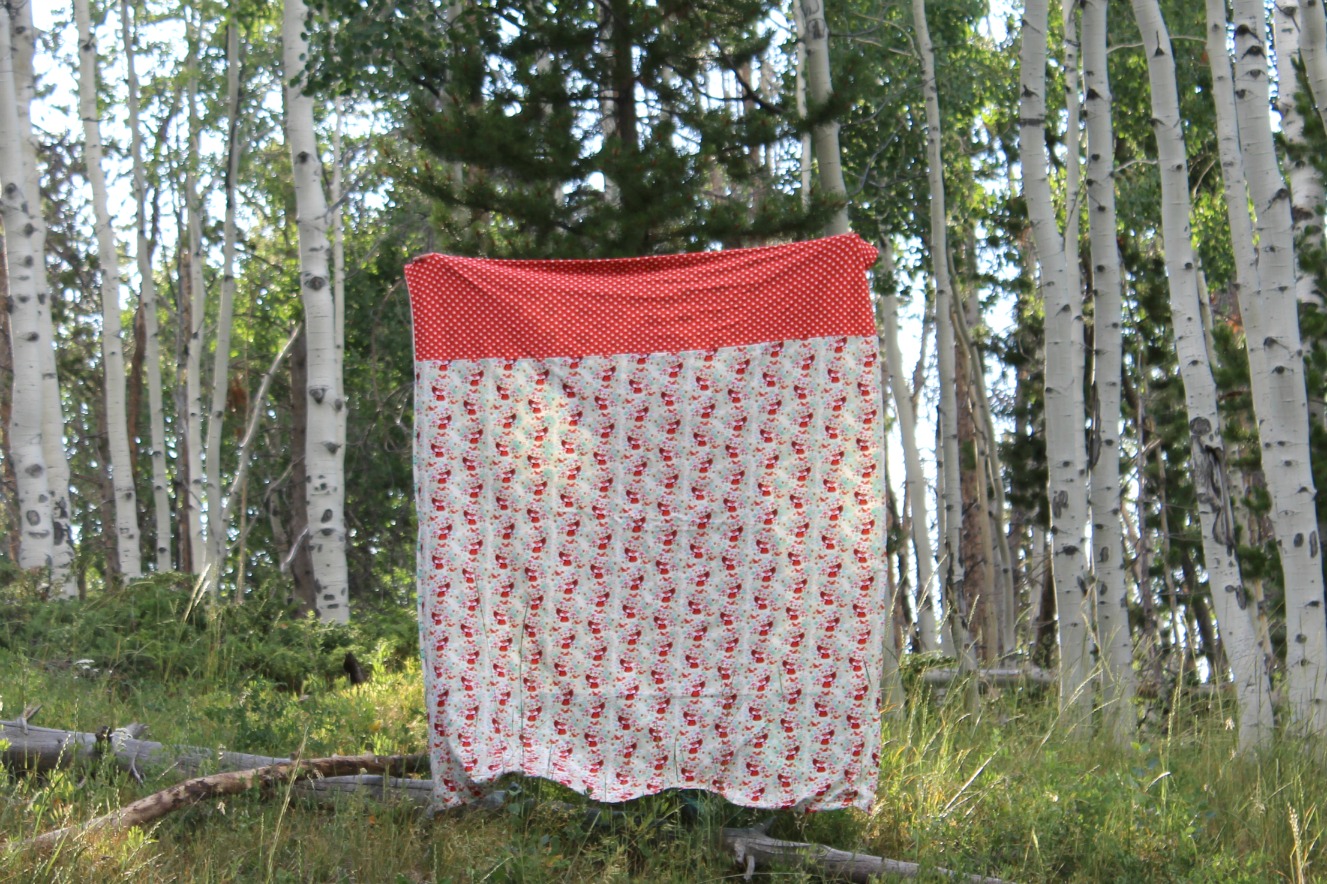
Today I get to share a project made with the beautiful Acorn Valley knits designed by Patty Young for Riley Blake Designs. These fabrics are absolutely adorable- from the foxes to the birds to the mushrooms and of course the colors.
A while ago, I made some duvet covers for my girls using Cottage Garden knits by Amanda Herring. They were so soft and cool to the touch, I often thought I would like to have a blanket for myself made out of Riley Blake’s gorgeous knits. So, when I was asked to participate in the blog tour, I immediately decided to make my very own dreams come true.
Now, this blanket might not be the most complicated thing to make, but if you’ve ever sewn with knits, you know that they can be just a bit unruly, especially when working with pieces on this scale. So, I’m going to share some tips with you today that will hopefully help you have success if you decide to make one for yourself.
What you will need:
1 1/2 yard cuts of two main fabrics
1/2 yard cuts of two accent fabrics
sewing machine needle for knit fabric
rotary cutter
clear ruler
*knits are 58/59″ wide so you will end up with a nice throw size blanket.
Directions:
Square up cut edges if necessary, sometimes it’s easier to do when the fabric is fresh off the bolt.
Wash your fabric. Knit will shrink up quite a bit so it’s better to wash and dry your fabric first.
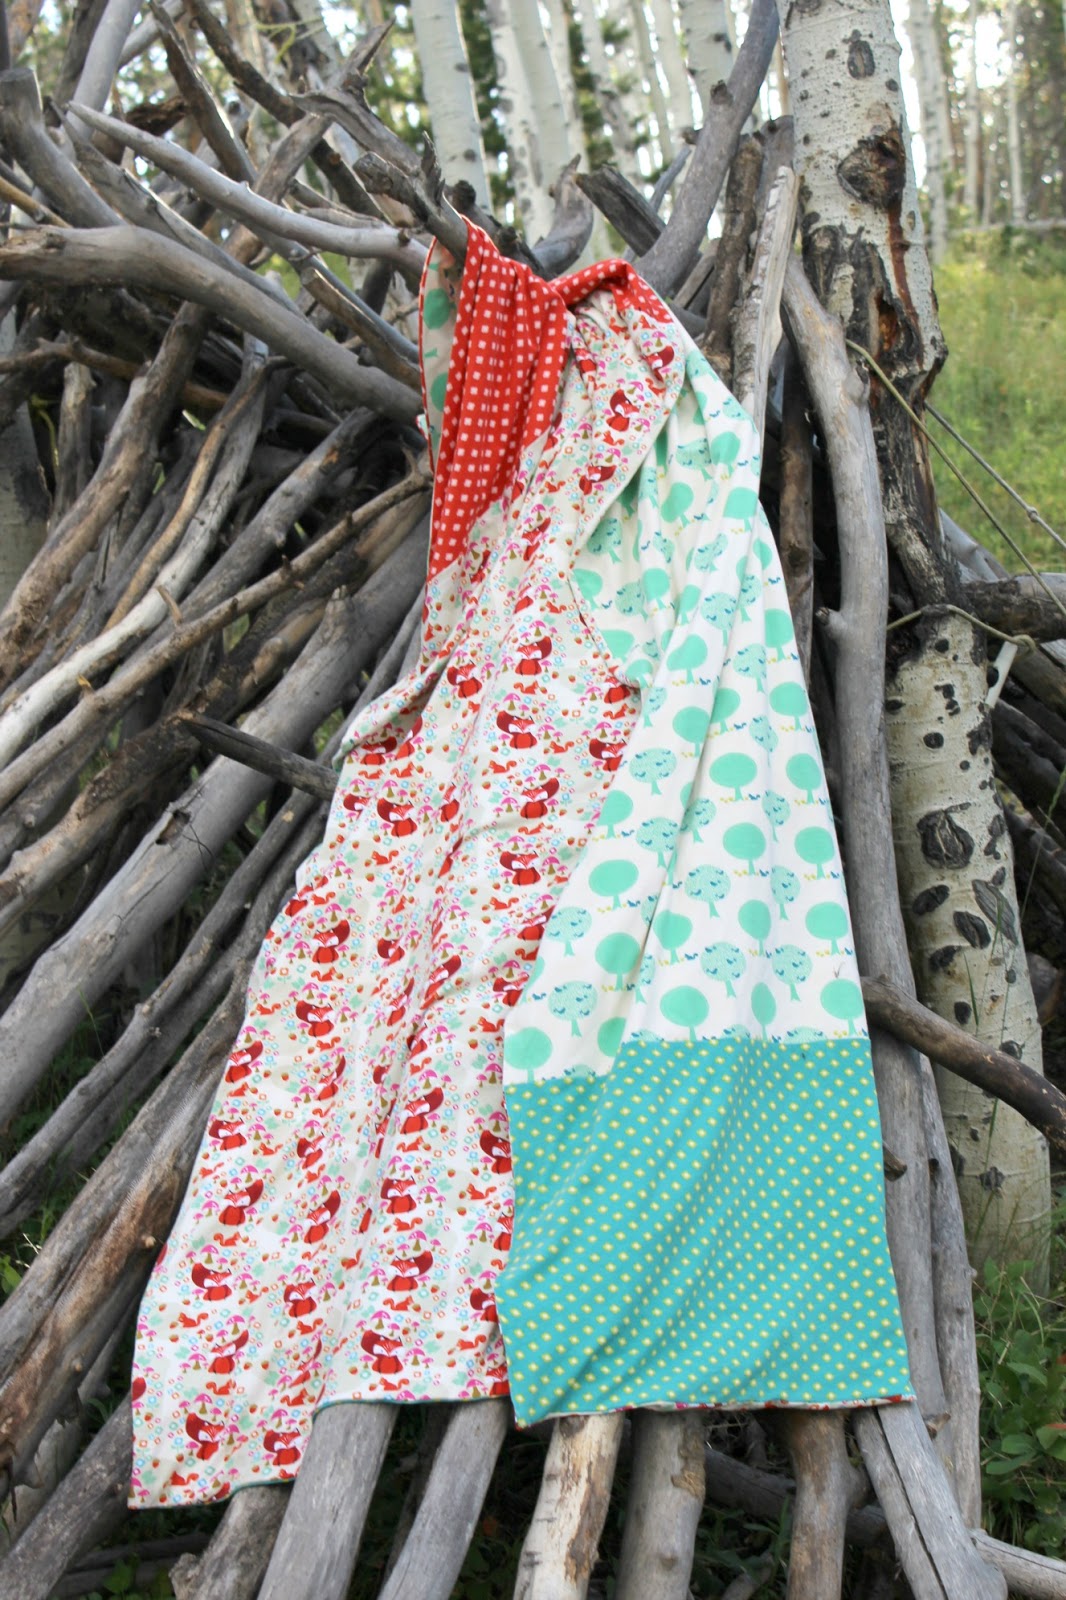
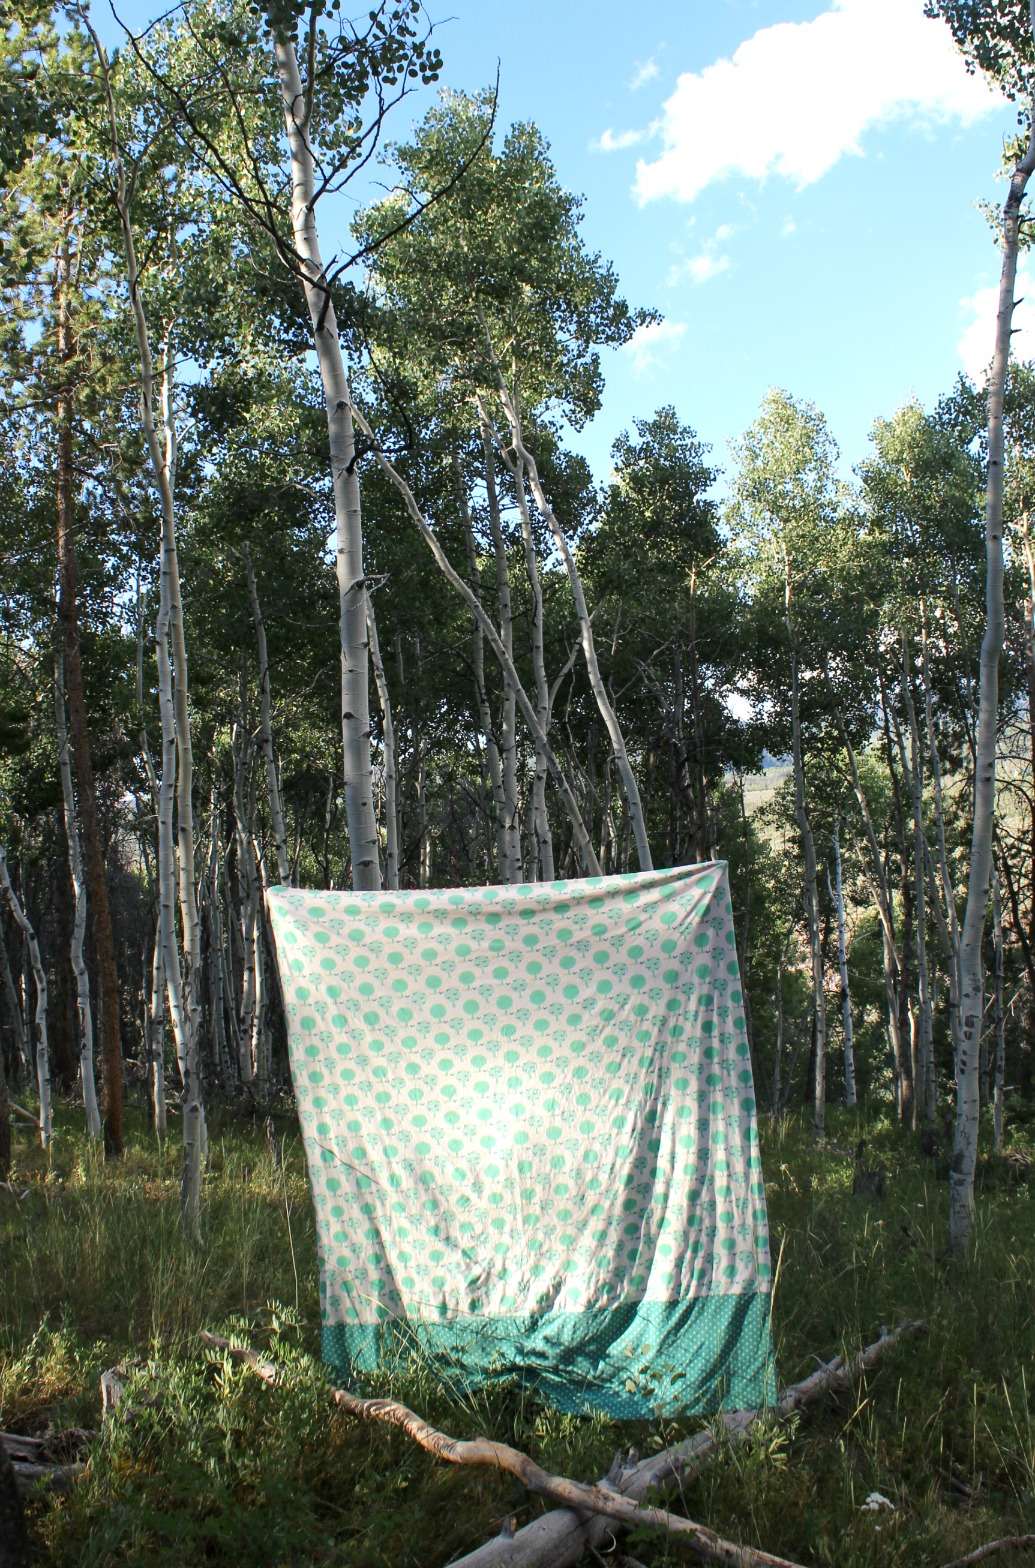
Decide which fabrics you want to pair up. I used the forest in cream with the teal dot, and the main in cream with the red dot.
This is where things get a bit tricky. Knit fabric tends to roll up, the cut side rolls one direction and the selvedges roll in the other direction. Lining things up can be frustrating, especially if you’re not sure your cut edge is straight. Here are some tips to help you:
- let go of perfection- this is not going to be a cotton quilt where the edges will be precise and lines perfect and it’s ok.
- use a ball needle for knits on your machine. It will go through the fabric much better. Make sure it’s a new needle and set your stitch length to a long stitch. I didn’t use a stretch stitch on this blanket, but you totally could.
- press your edges. I read a few places that starching the fabric would help, and it does, but it will still not lie perfectly flat. I did not starch the edges multiple times because I was worried that repeated pressing might distort the fabric doing more harm than good for my blanket. So, I lightly starched the edges and let it go.
- Pin, pin, pin. Use lots of pins to hold your edges together. This is especially helpful when sewing so your lines will end up as straight as possible.
- Take your time. This will not be as quick a finish as you might first think, but don’t let that frustrate you, the end result is totally worth it!

Let’s get sewing!
1. Sew your accent pieces to the respective main piece for each side. Press your seam flat.
2. Place your front and back pieces right sides together, pin and sew together the first selvedge side using a generous 1/2″ seam allowance. (use whatever s.a. will encompass the entire selvedge) You will have to unroll both pieces and line them up as best you can.3. Use the seam you just sewed to trim the next side. My pieces weren’t cut exactly even, so one side was longer than the other, but even if they are the same length, cutting off the rolled edges is a much easier way to get a clean edge than trying to unroll the seam and pin every side.
- Start by lining up the seam with the short edge of your clear ruler.
- Push the rolled edges out as much as you can using the ruler, but make sure you don’t let the ruler go crooked, and also check to make sure you aren’t distorting the fabric.
- Trim off the rolled edge as far as you can with your ruler.
- Slide the ruler up a bit and pin the edge you just cut.
- The fabric will be nice and straight. Keeping your ruler lined up with the cut edge, slide it further along the rolled side and keep trimming away the rolled edge and pinning as you go until you get to the end.
- Sew along this edge.
4. Repeat for the last two sides, leaving an opening for turning on the last side.
5. Trim off the rolled edge of the first side if necessary.
6. Turn right side out and roll and press all the side seams.
7. Turn under the seam allowance on the opening you left for turning and stitch closed. This will make the edge a bit wavy, but it’s not really a big deal, just press it flat once you’re done.
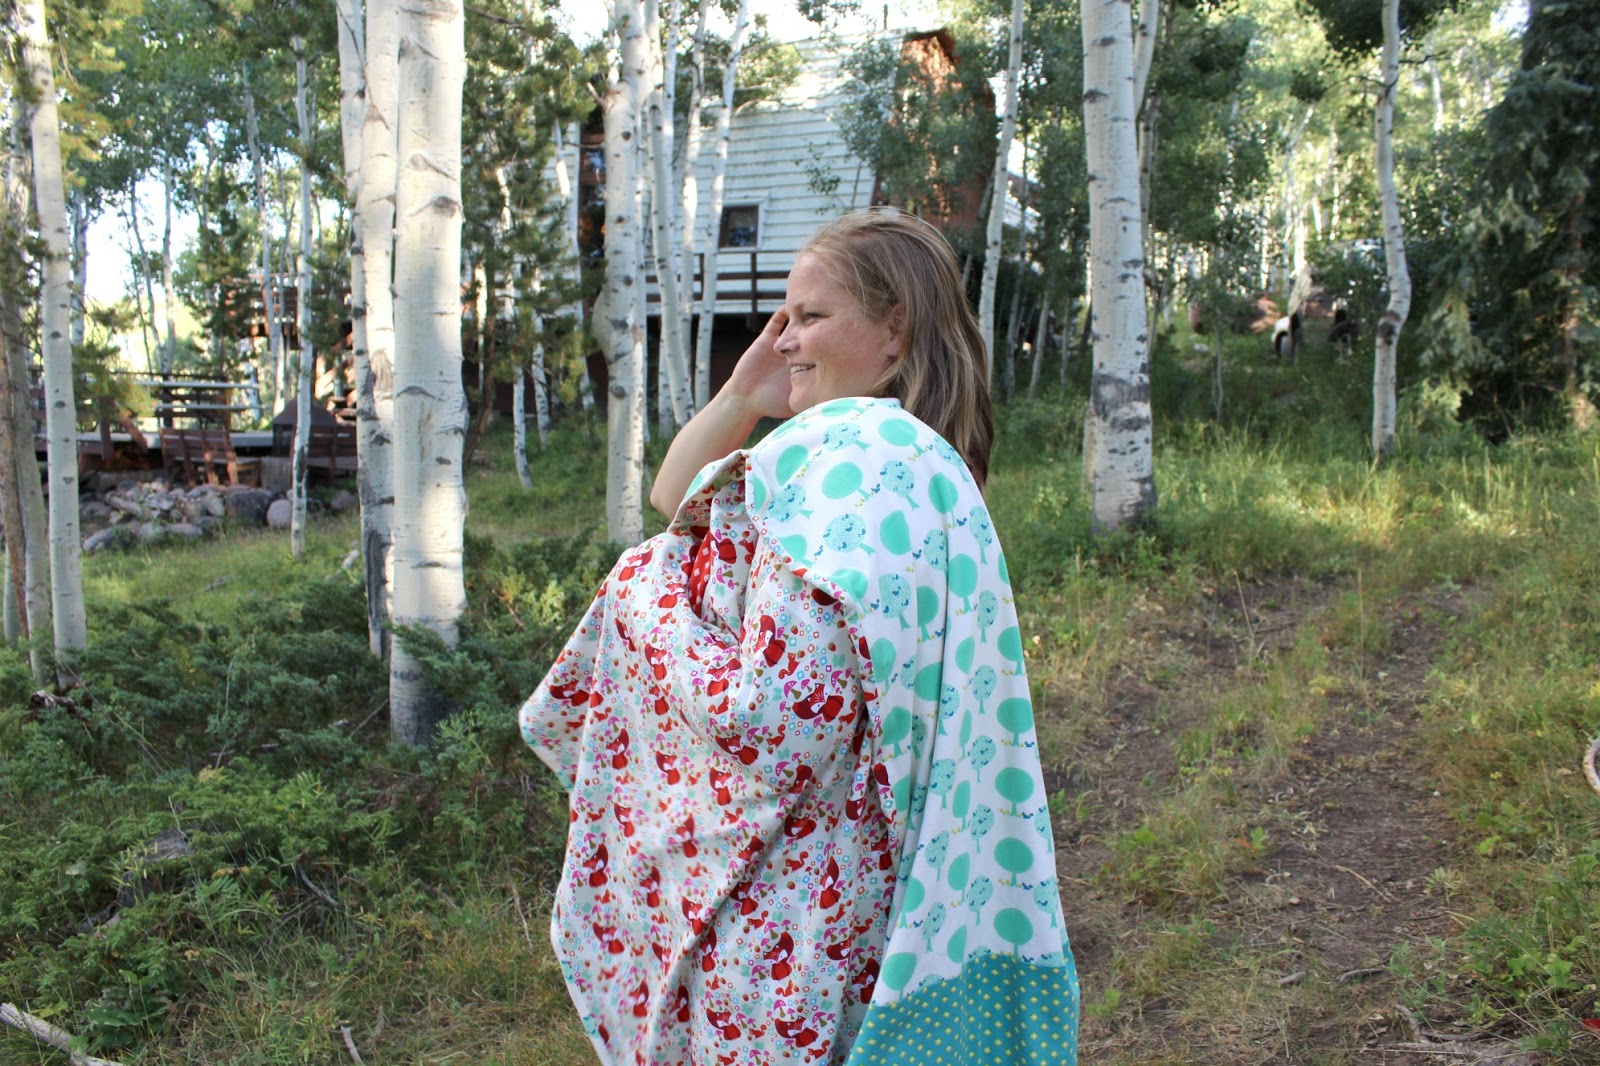
8. Now, take your new blanket out to the woods and take pictures of it. Just kidding- but it’s really fun if you do!
9. Enjoy!
I hope you’ll take some time to click over to the other stops on the Acorn Valley Blog Tour- there are some super cute outfits and projects made with this darling fabric, and now that you’re not afraid of knits, you can sew some up!


Courtney @ Sweeter Than Cupcakes
July 22, 2016 at 12:28 pmGreat project! Love the woodsy photos!
Cassy Gobin
July 22, 2016 at 7:27 pmSuch a quick throw idea, and I do love that fox fabric!