
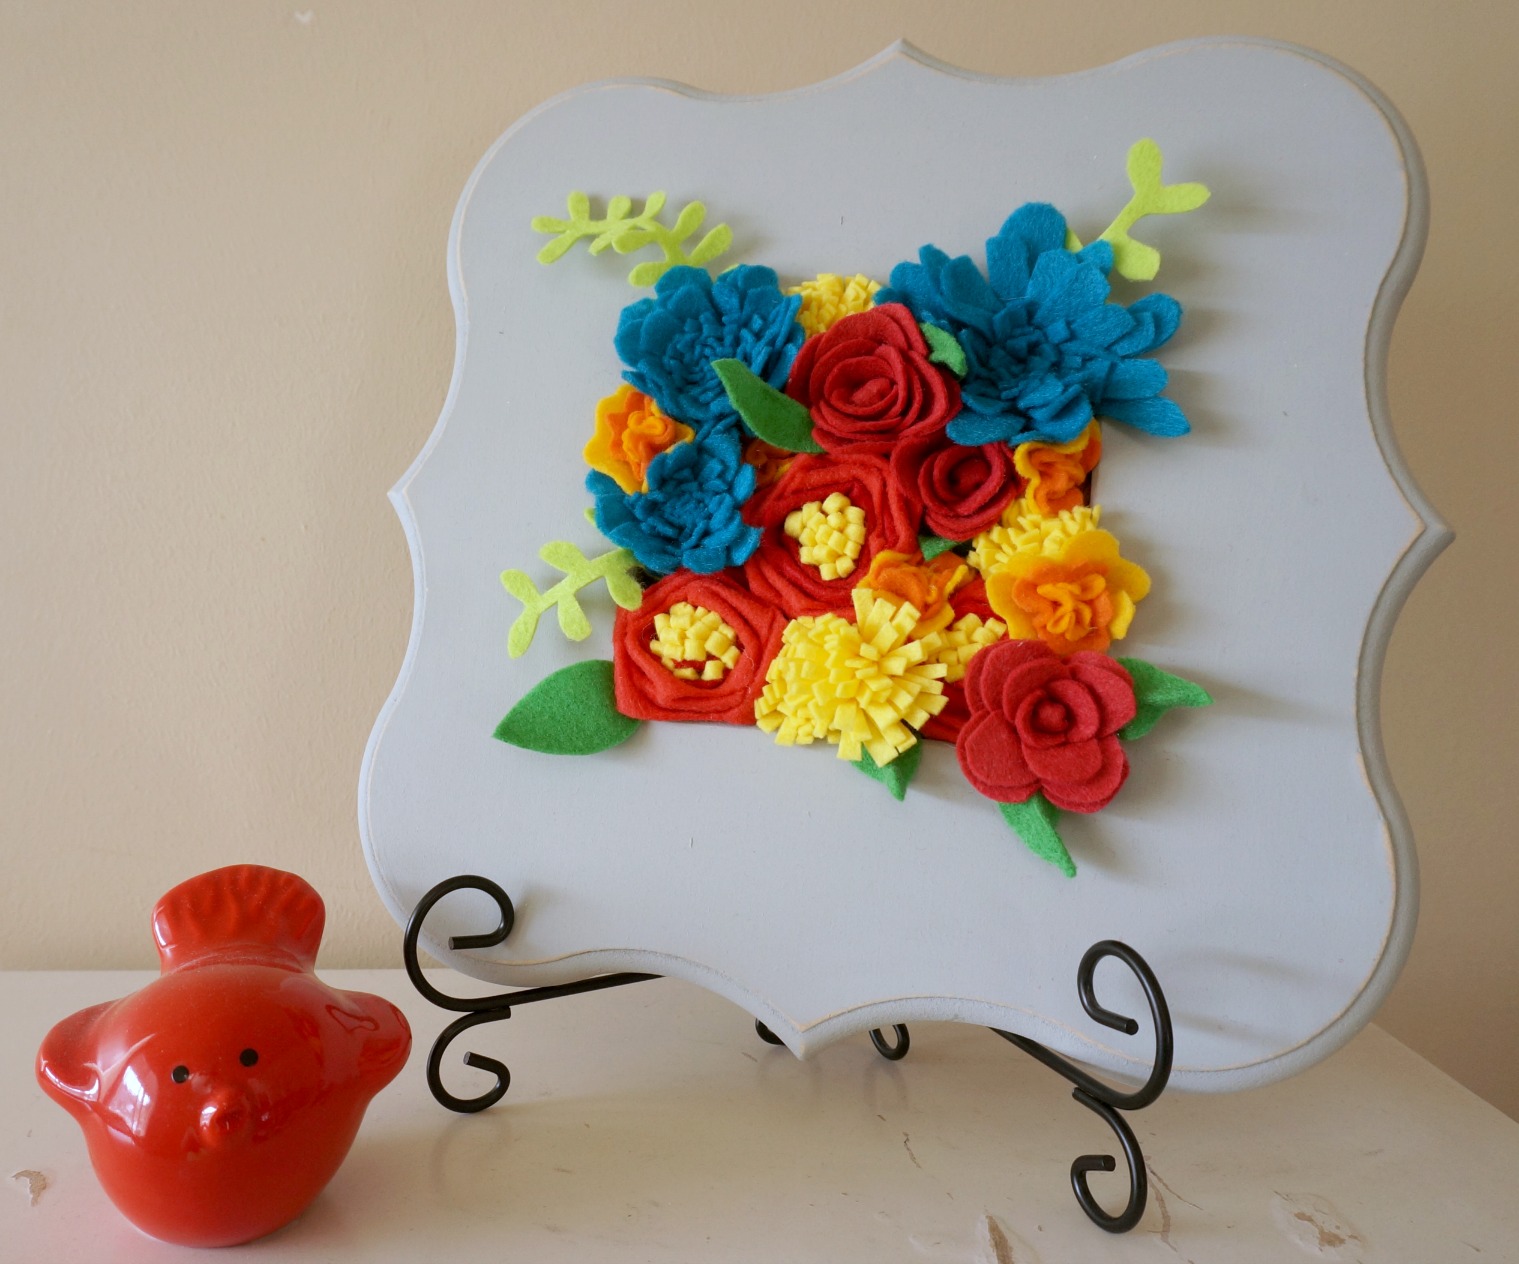
It’s always this time of year when I start itching for warmer weather and sunshine. We seem to always have a warm spell that gets our hopes up, which is quickly followed by colder weather and snow. So, until spring gets here for real- I decided to create some sunshine of my own and make this fun springtime floral frame. It’s just the right colors for my living room and it might just live in there all year round.
These flowers are so versatile, you could use them for clips or headbands, on purses- or just use them to embellish any home decor project you have going on- I have the how to, right here for you!
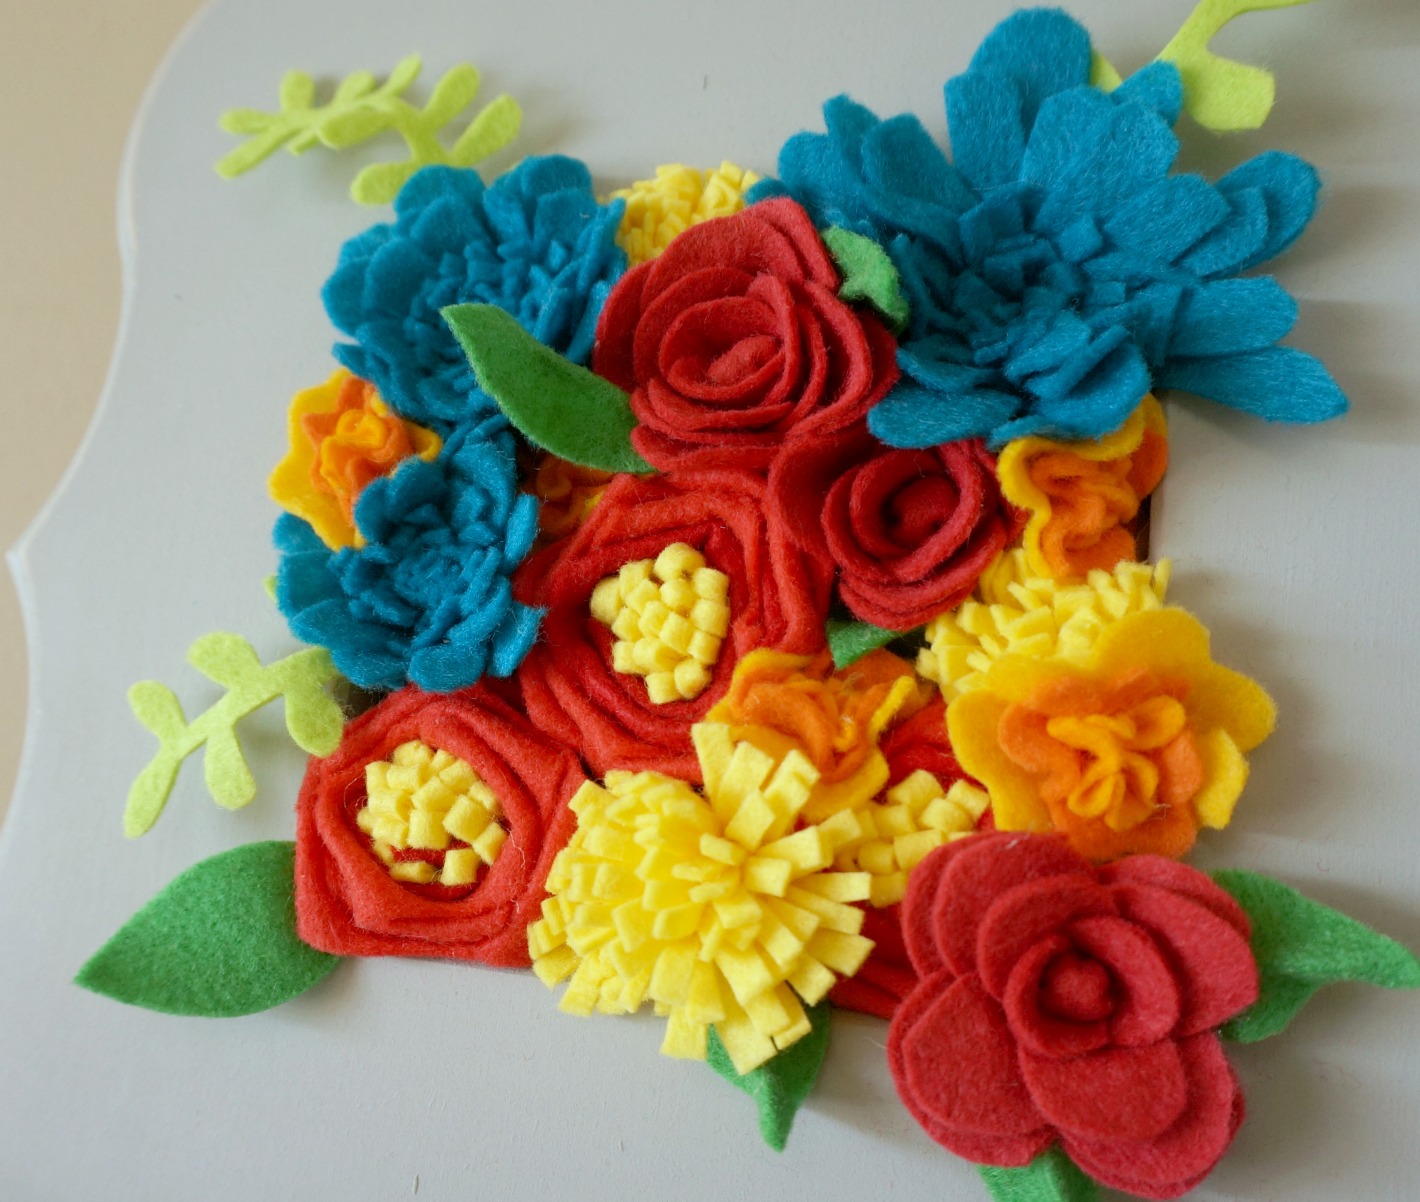
Here’s a close-up so you can get an idea of what we’re making.
A few notes to keep in mind: 1. flowers in nature are not exactly the same, and your flowers won’t be either- this is good- it adds interest and depth to your project. 2. I used acrylic felt on these- it’s cheap and I had it on hand. But, feel free to use any kind of felt you want. Wool felt is gorgeous, but can be expensive. I really like bamboo felt as well.
Supplies:
- felt
- hot glue gun and glue
- sharp scissors
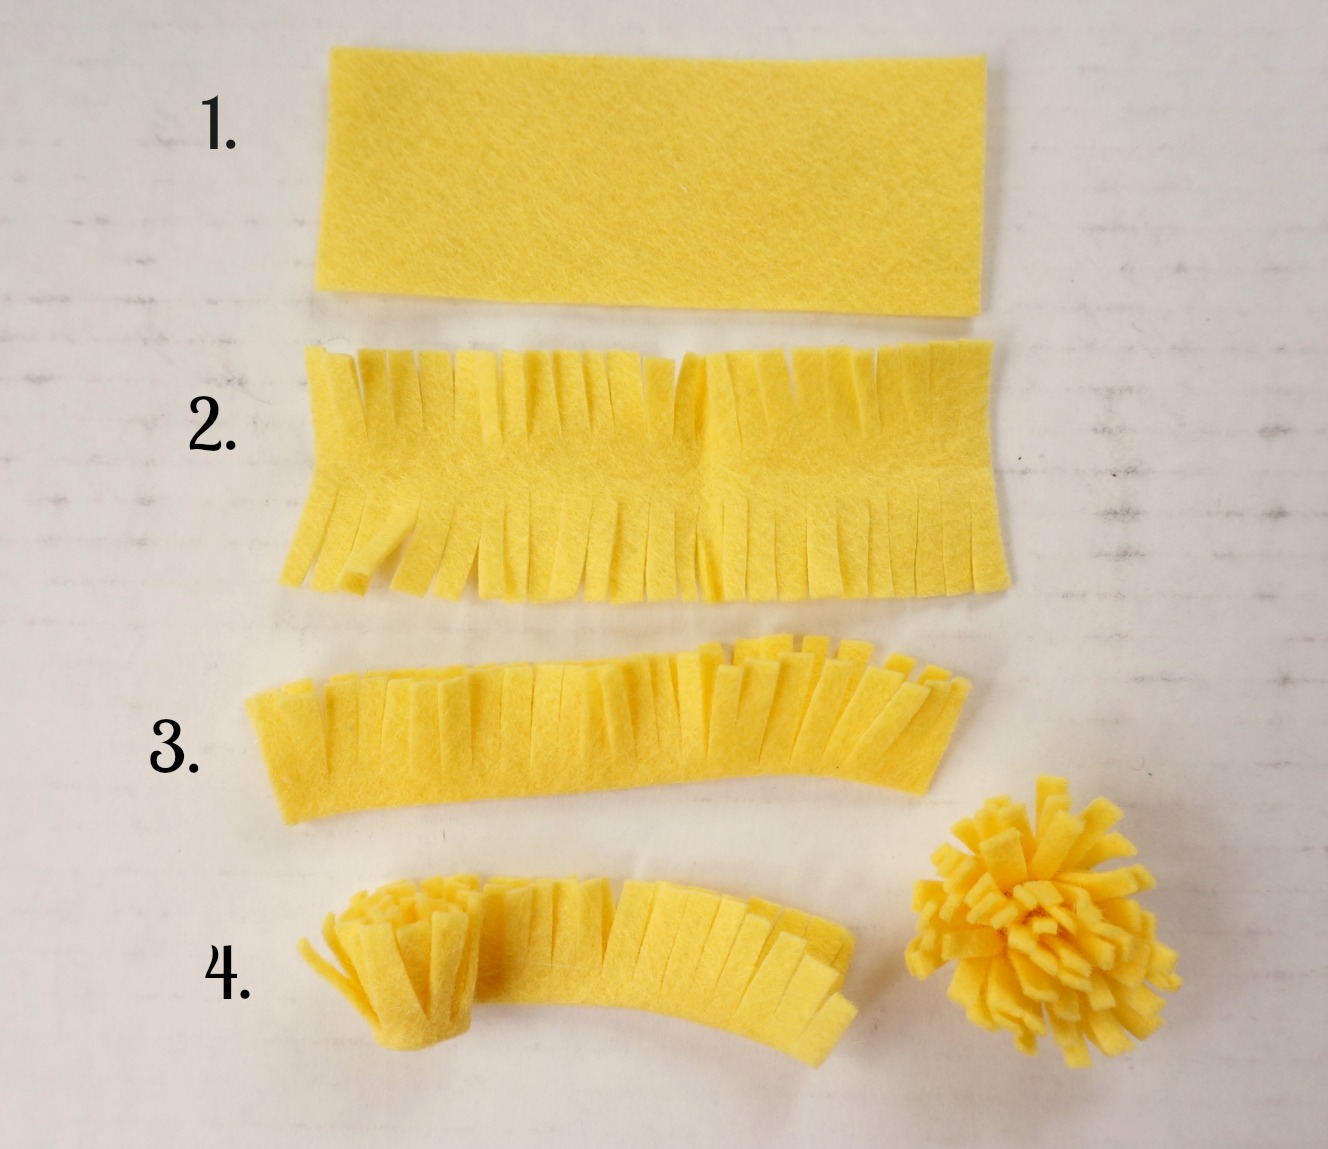
1. Begin with a rectangle of felt. Mine was about 1 1/2″ X 3″- the wider the piece the taller the flower, the longer the piece the fuller the flower.
2. Fold the felt in half along the length of the rectangle. Using your sharp scissors cut a fringe on the open side. Mine were approx. 1/8″, but it will vary. Don’t cut through the fold.
3. Run a line of hot glue along the center of the rectangle and glue the felt in half. (I do this after I cut so I don’t ruin my scissors by cutting into the glue.)
4. Put a small dot of glue on the bottom corner of the rectangle and begin rolling the felt. Keep the folded edge lined up and flat. Add glue as you roll- about 1/2″ at a time.
* You can either keep the flower bunched up like it is, or flatten it out a bit. You may want to trim it up a bit when you’re done to get the shape you want.
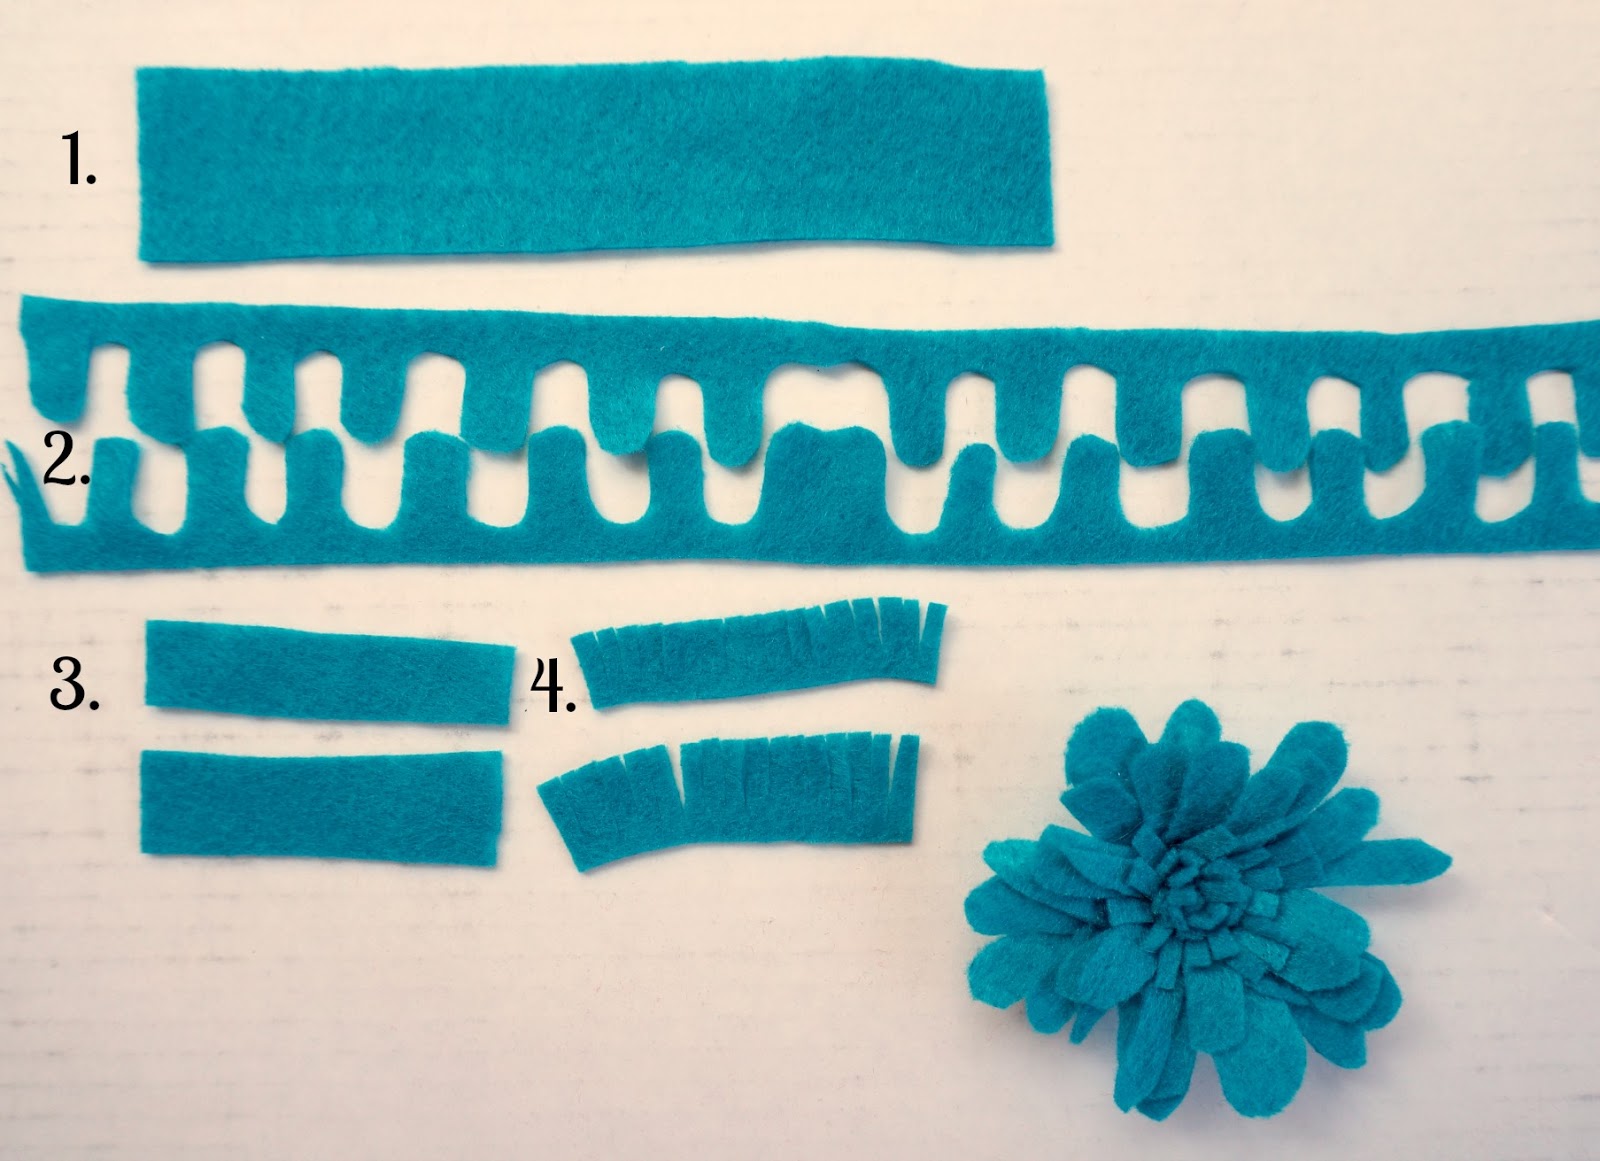
1. Begin with a rectangle about 2″ wide and 12″ long. (the piece in the picture is smaller than that)
2. Take your long rectangle and cut it in half with scissors using a steep wave as shown. (I fold it in half to do this so it goes faster, but you might end up with the same weirdness I did in the center- it’s totally fine and you can either cut the large bump in half, or just leave it- it adds character. 😉 )
3. Take a small rectangle of felt about 2″ X 3″ and cut it so you have a 3/4″ piece and a 1 1/4″ piece.
4. Cut fringe along one side of both pieces.
5. (not shown) begin rolling the pieces together as we did in the last one. Start with the short fringed piece, when you get to the end of the short piece, add the taller fringed piece then move on to the wavy pieces. As you are rolling the wavy piece, try to get the petals to stagger a bit- you may need to fold in some of the felt between the petals to get them to offset each other so you don’t have them all stacked up. When you have added both wavy pieces, flatten out the petals to create the flower. You may want to trim some of it up to get the shape you want.

*this flower is a bit more involved, but just a bit. It looks complicated, but it’s really not- just follow the steps and you’ll have it down.
1. Cut a rectangle 1 1/2″ X 12″ of your lighter red felt.
2. Cut this rectangle in half using a rolling wave shape.
3. Use hot glue to fold down the tops of the waves. You may need to hold them in place until the glue cools down a bit.
4. Cut a rectangle 1 1/2″ X 4″ from your darker red felt.
5. Repeat the same steps as you did for the lighter red felt- cut in half and glue down the petals.
6. Cut a 2″ X 2″ piece of yellow felt.
7. Fold in half and cut a fringe along the folded edge.
8. Glue the long ends of the rectangle together.
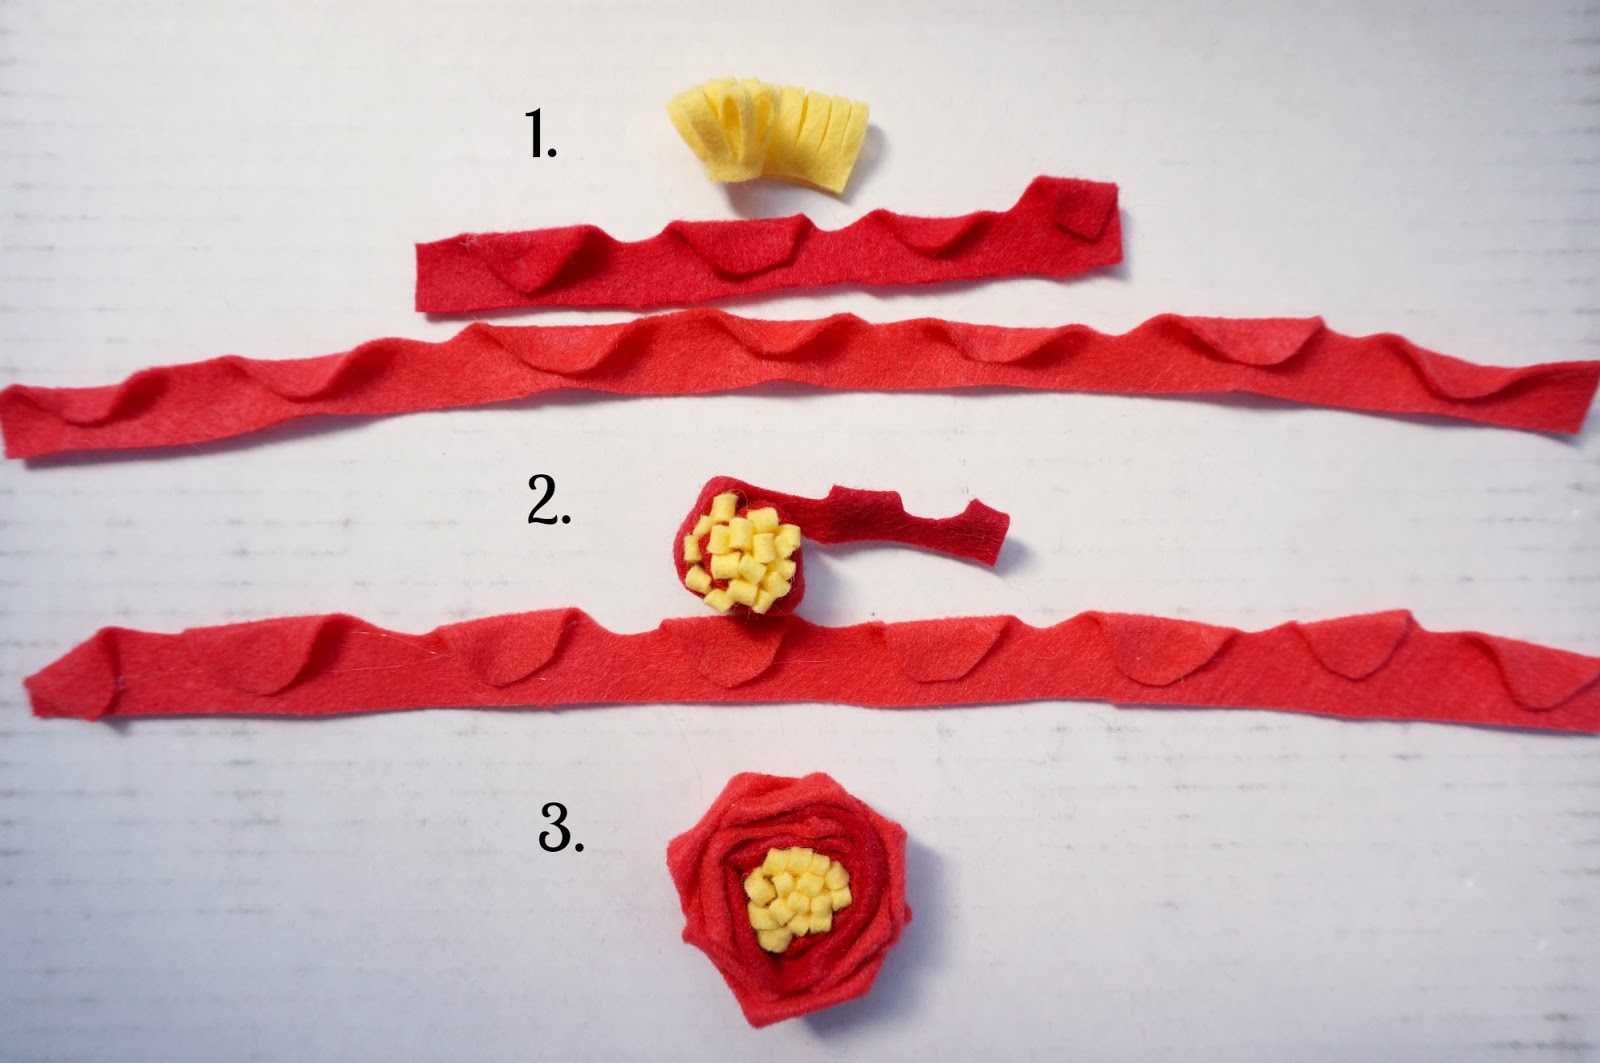
Assembling the flower:
1. Start with your yellow piece of felt and begin rolling it up- use glue to hold it in place. Stop when you have about 1″ of felt left.
2. add in the dark red piece. Make sure the folded petals are facing away from the center. Roll and glue until you have about 1 1/2″ left.
3. Add the light red piece and roll and glue it on. *you will only use one of the light red and dark red pieces per flower- just make another center and you will have two flowers made.
Now you will just want to use some green felt to create leaves. I just free-hand cut the leaves using two different colors of green.
Add them to your frame or projects as desired.
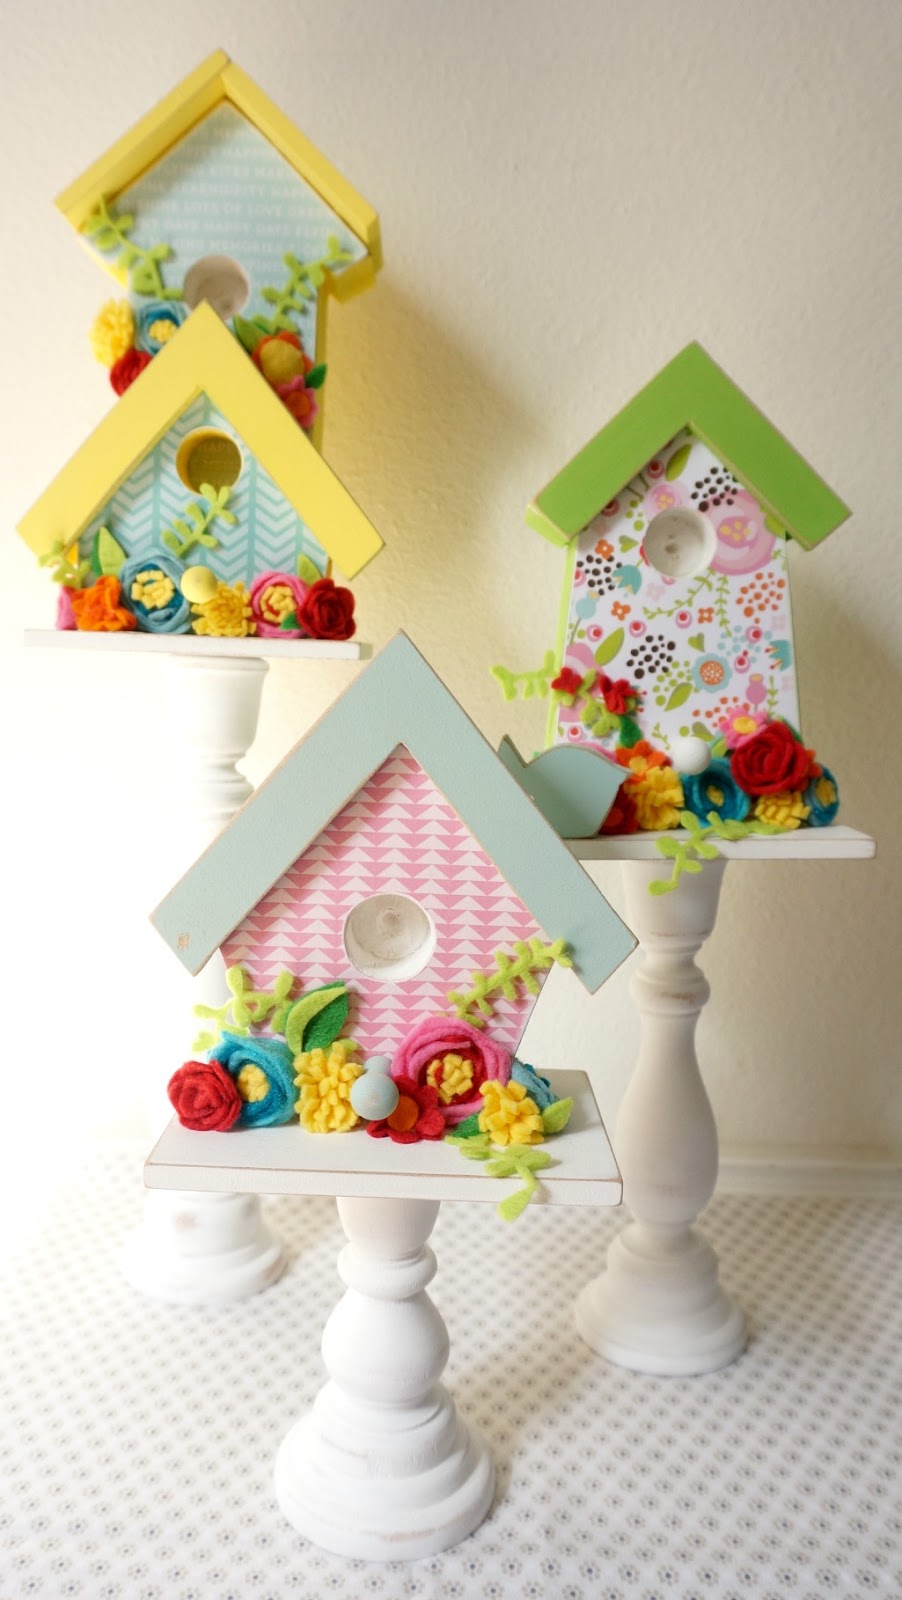
I made mini versions of the flowers (using about 1/2 the size of rectangles in this post) to embellish these birdhouses from The Wood Connection. You can find the tutorial for the birdhouses- and the Rose flower over on their blog here.

You can also see a few more flower ideas and a fun way to embellish your home or holiday decor in this Holiday Deer Head post.
I hope you have lots of fun creating all these felt flower ideas!
xoxo,
Amy

