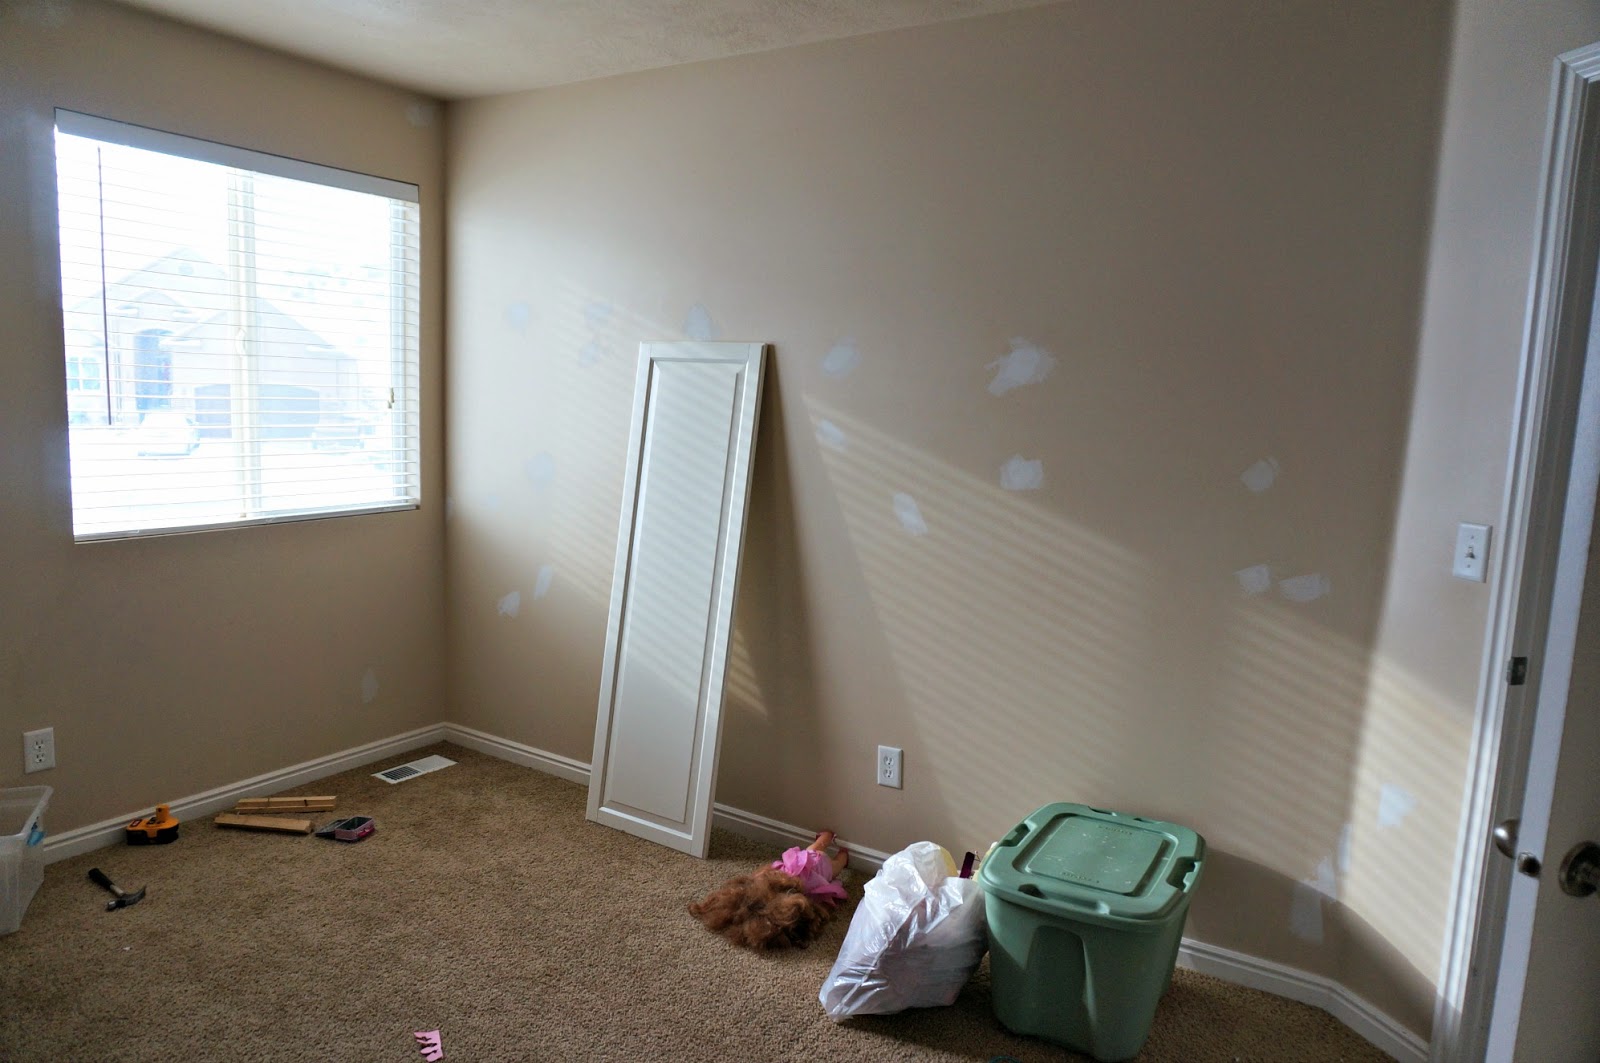
We had already moved out the bed and other essentials when we realized that instead of a different room for the makeover, this one would have to be the target of our efforts, hence the ghetto before pictures. 🙂 There were holes all over the walls, and one very red wall to contend with. You can see it below with the primer already cut in.

My sweet husband did all the priming and painting since I couldn’t. Plus, with as lousy as I was feeling, the room would probably still look like this if he hadn’t. Lucky for all of us he did a fabulous job and it was ready for me to pretty it up. I will be posting tutorials over the next few days on many of the projects I did, but if you have questions, feel free to ask in the comments!

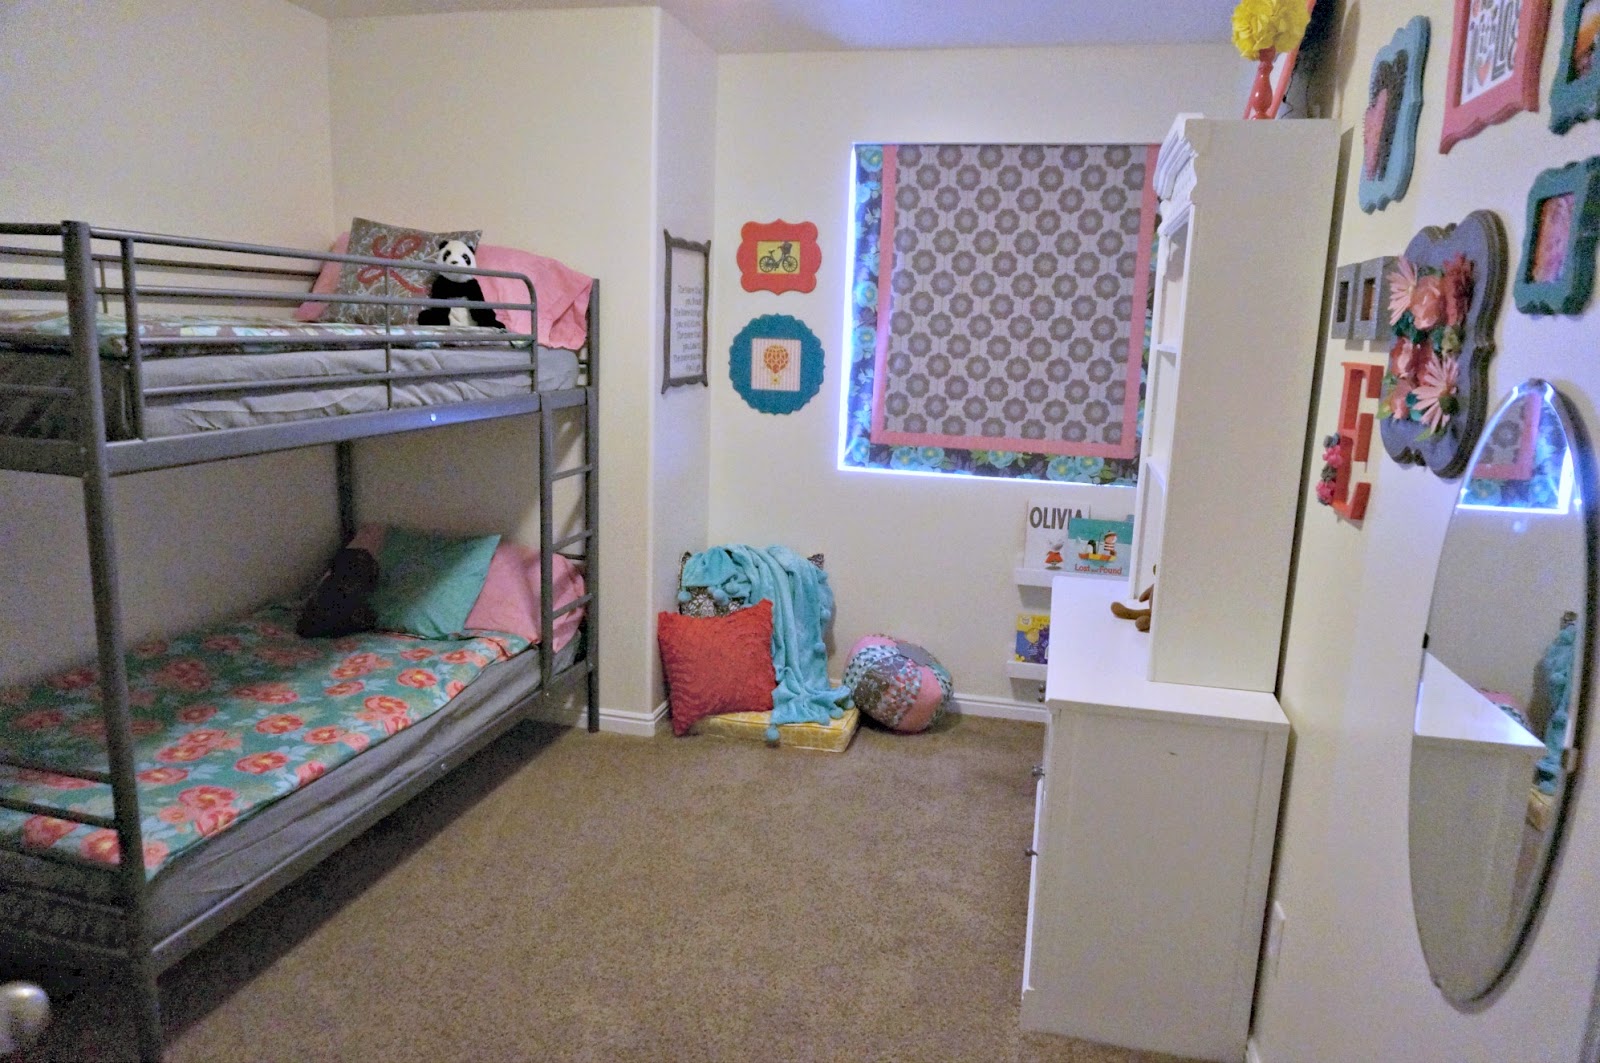
Oh, this room makes me happy. My starting point was the lovely fabric. I used fabrics from The Cottage Garden line by The Quilted Fish for Riley Blake Designs. The duvet cover tutorial will be a post coming up on their blog where I am a design team member. I picked up a few more yards of cotton from the line and made the roman shade, a couple of pillows and the pouf in the reading nook.
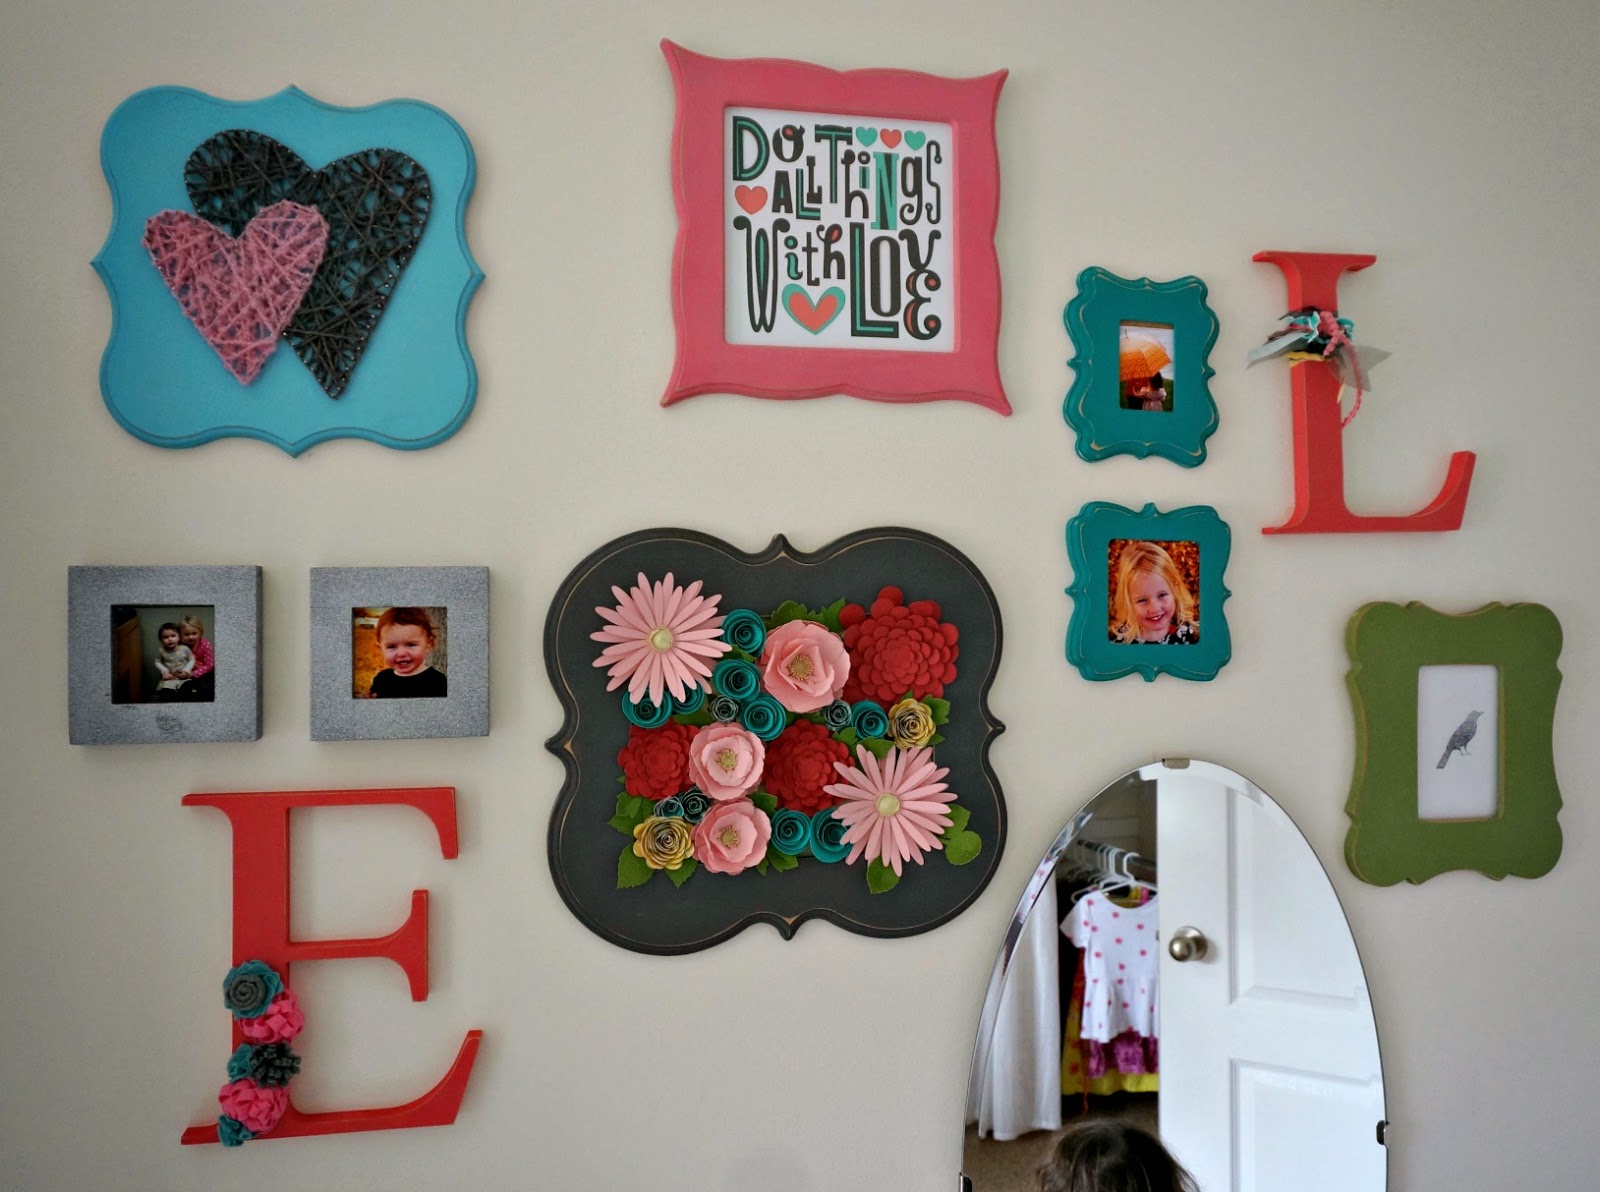
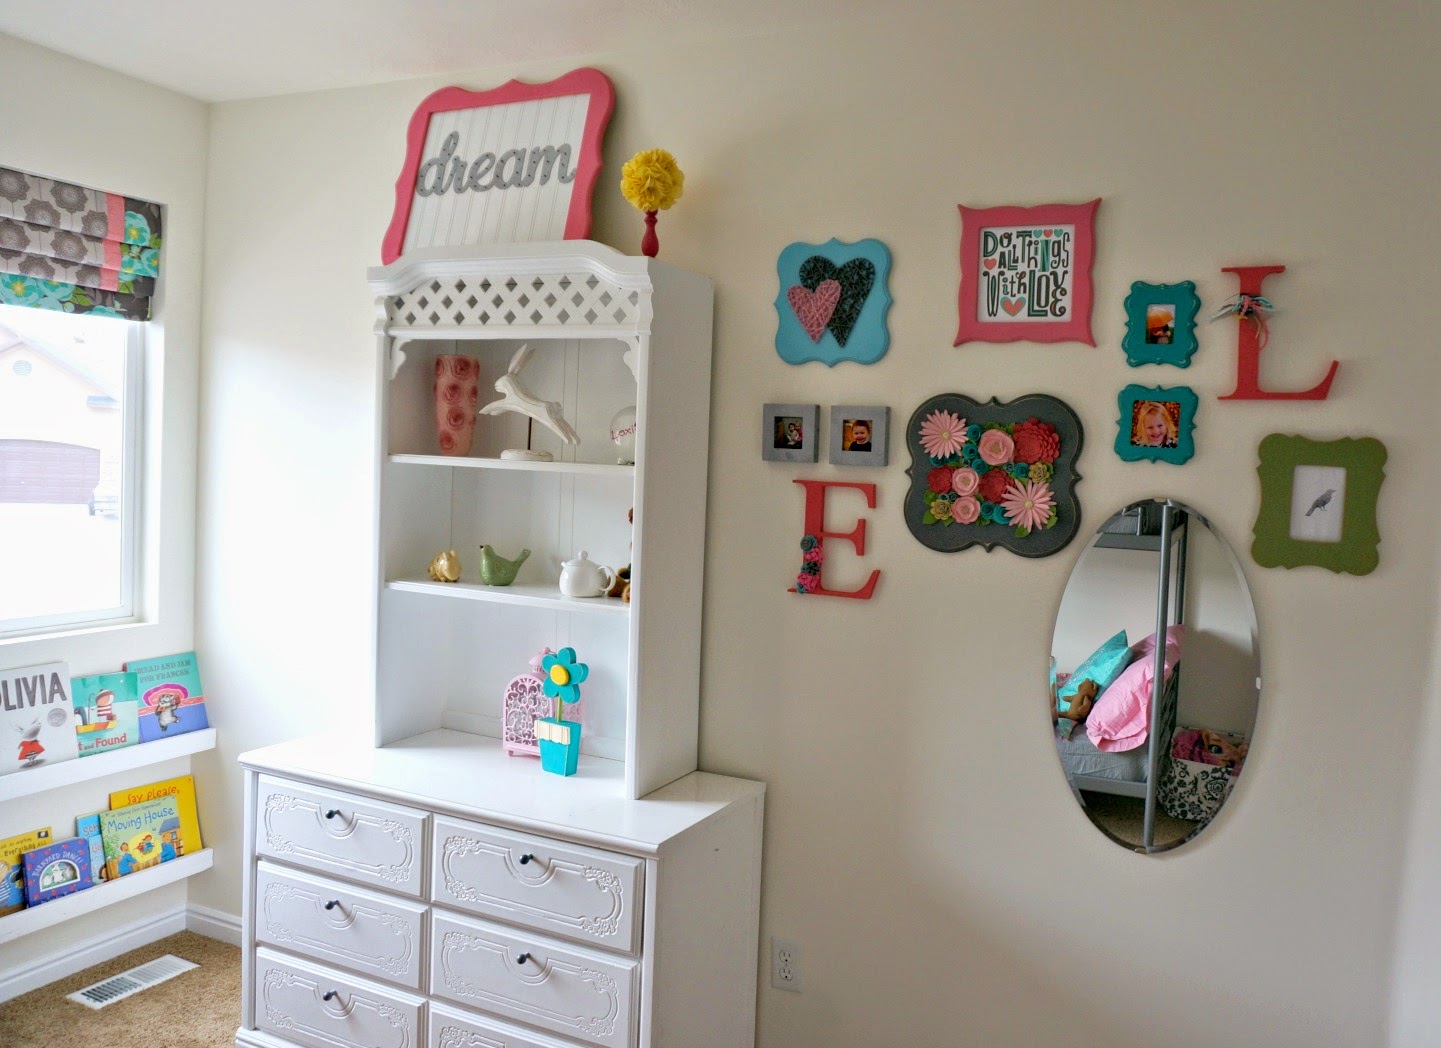
This gallery wall was so fun to put together. The “do all things with love” art is from a design space project by Rob and Bob, it just came out for Valentine’s day, but it was the perfect piece to add to the wall. All the flowers in the gray frame were cut and made using the cricut and the template for the heart string art was provided using the write function of the Cricut Explore.
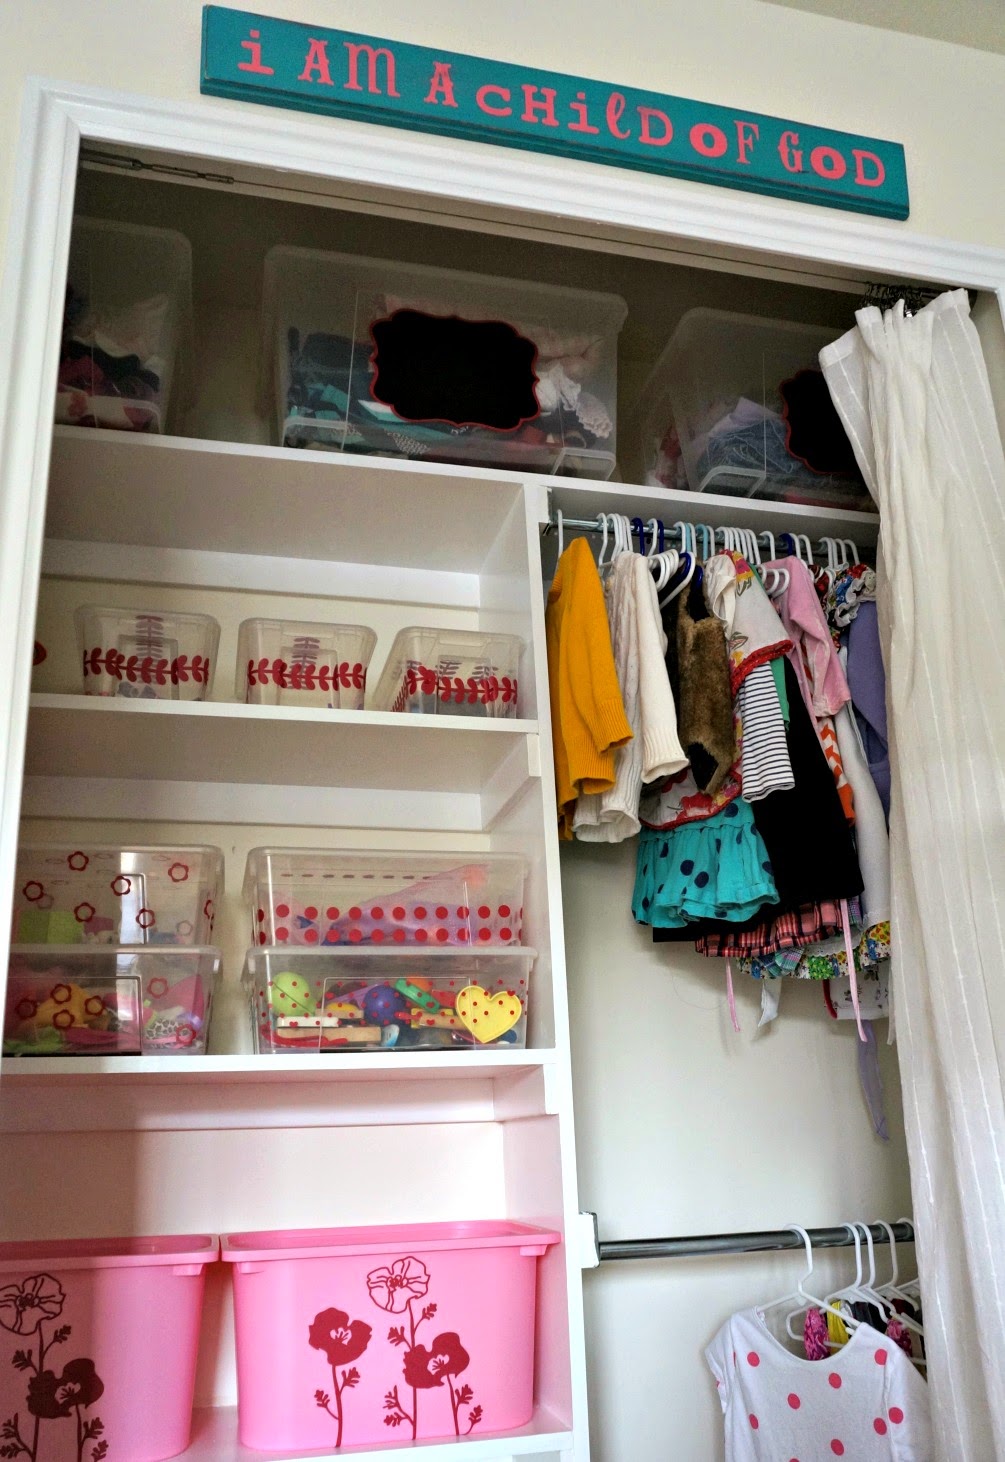
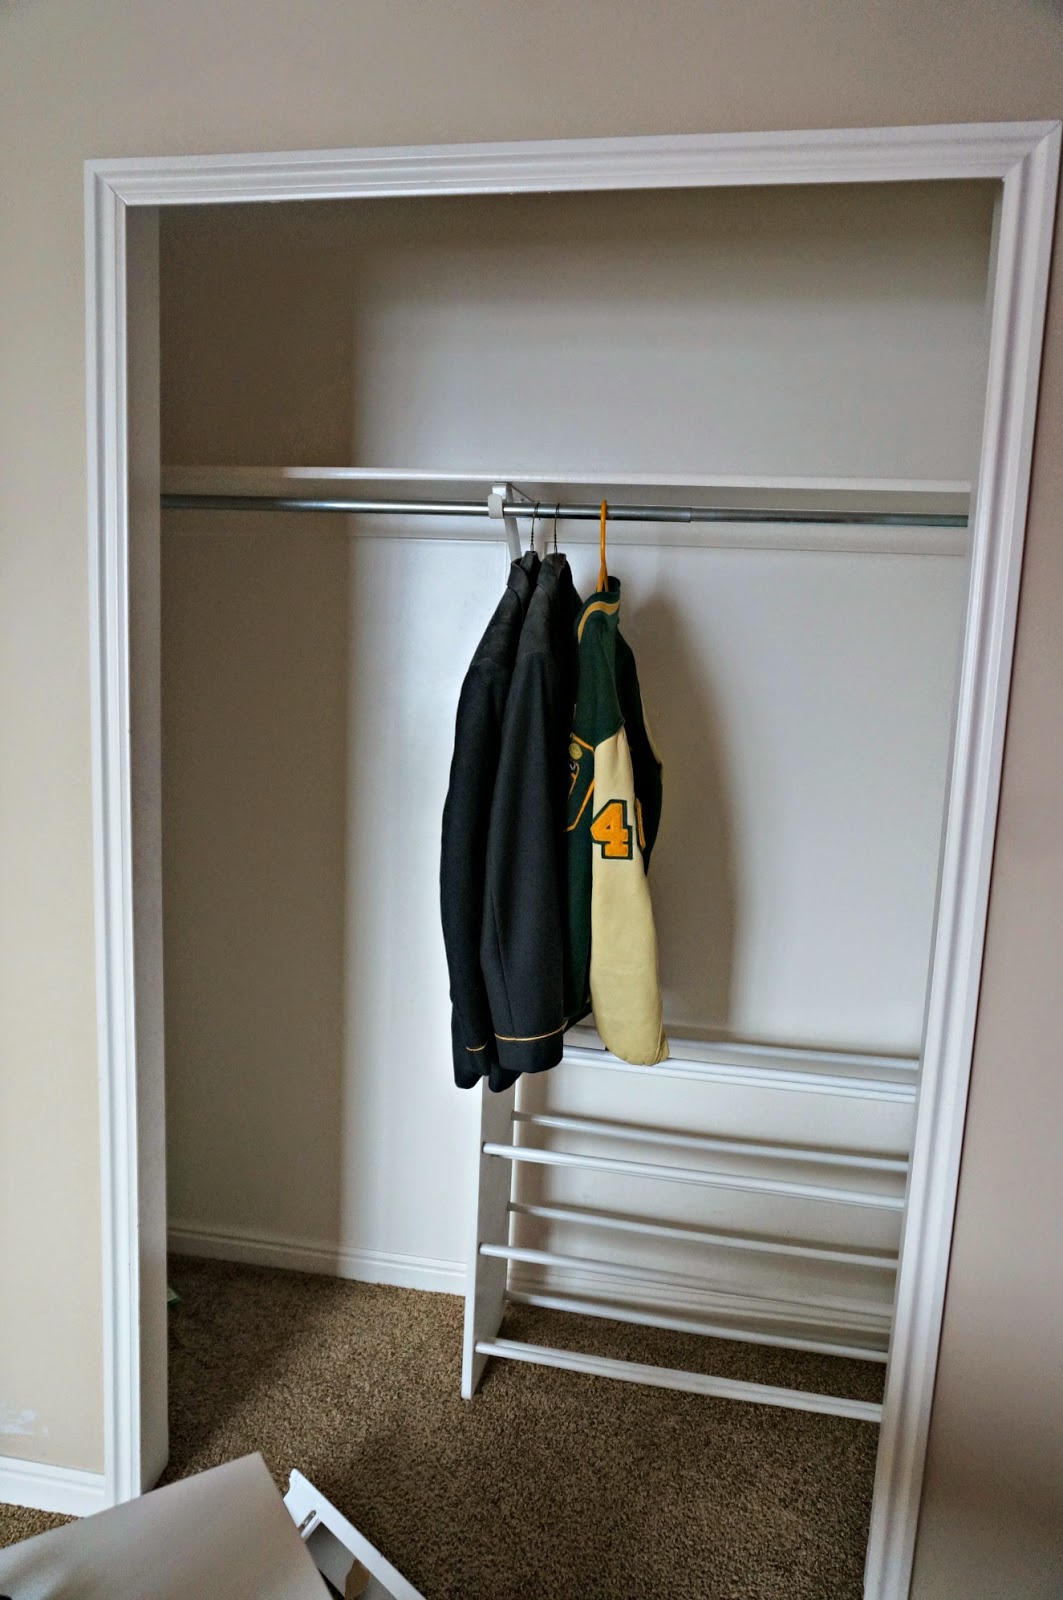
This closet after shot makes me giddy. I love being able to have a place to put everything. Target had some darling patterned totes and I thought about splurging on them, but these bins from Ikea were so inexpensive I just couldn’t justify the difference in cost. So, I pulled out a few rolls of Berry colored vinyl and got to work. I didn’t want to label them with specific types of toys, this way I can rearrange what tote holds what without having to cut more vinyl. The bins at the top hold clothes that are grown out of or being grown into, I cut chalkboard labels so I can mark which sizes are in which tote and change it as the girls change.

Here’s a close up of some of the vinyl, I love this little polka dot with hearts scattered through.
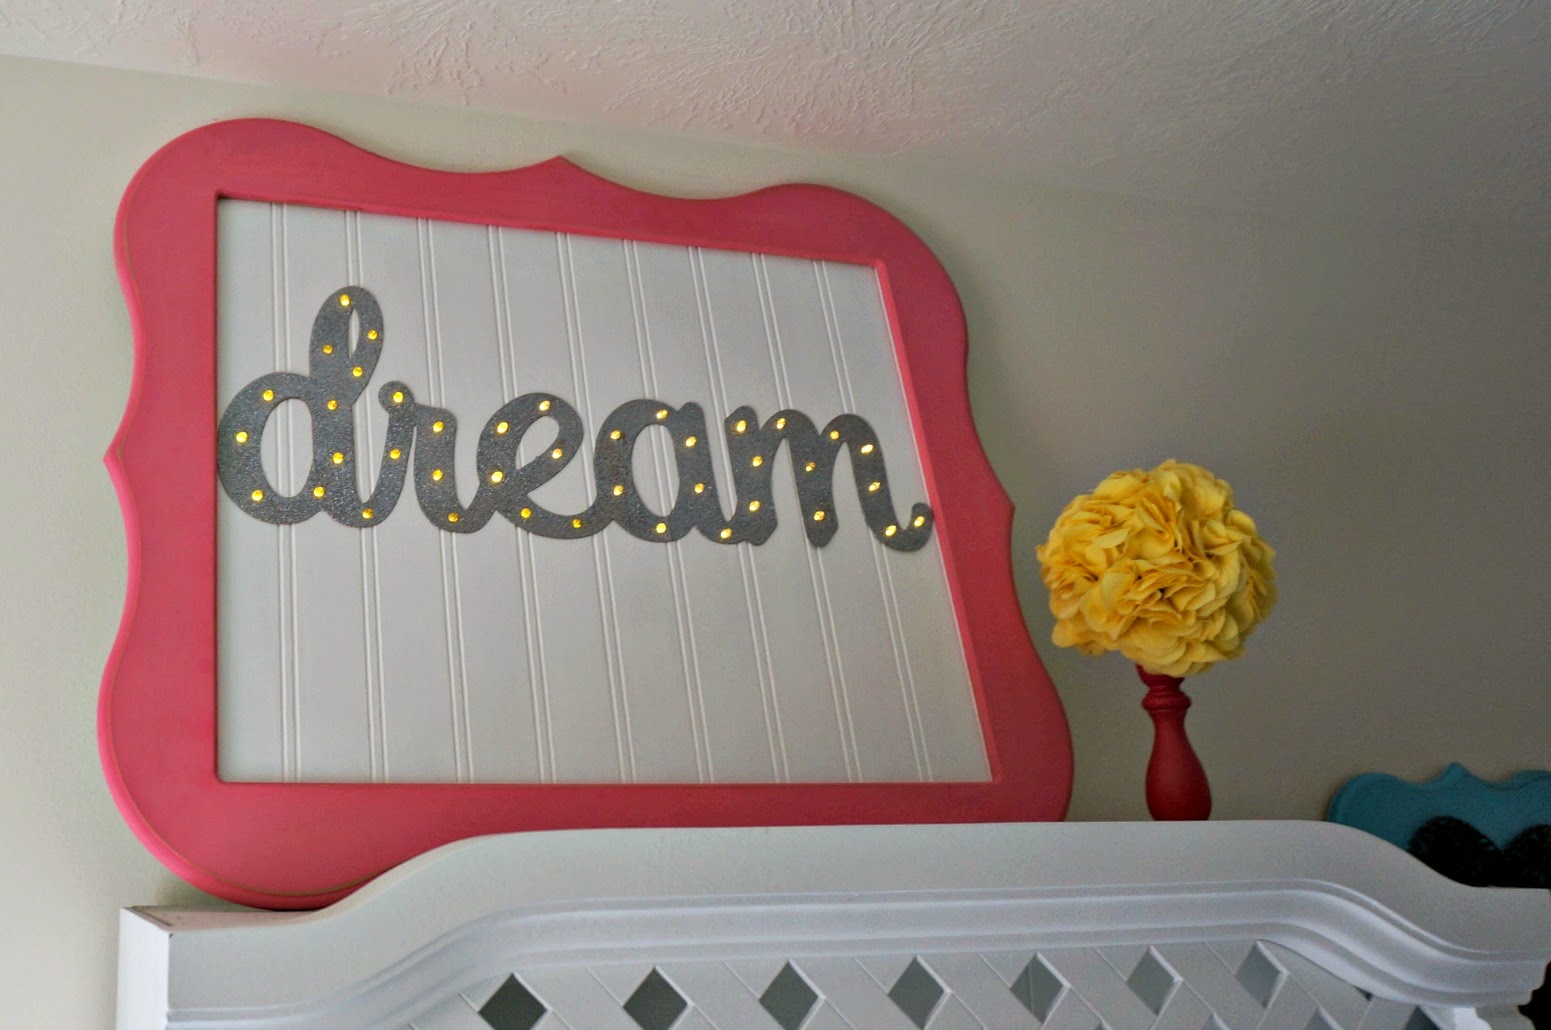
This dream marquee sits on top of the dresser and it’s one of my favorite projects. It has battery powered lights that have a timer on them, it works perfectly as the nightlight for my girls.
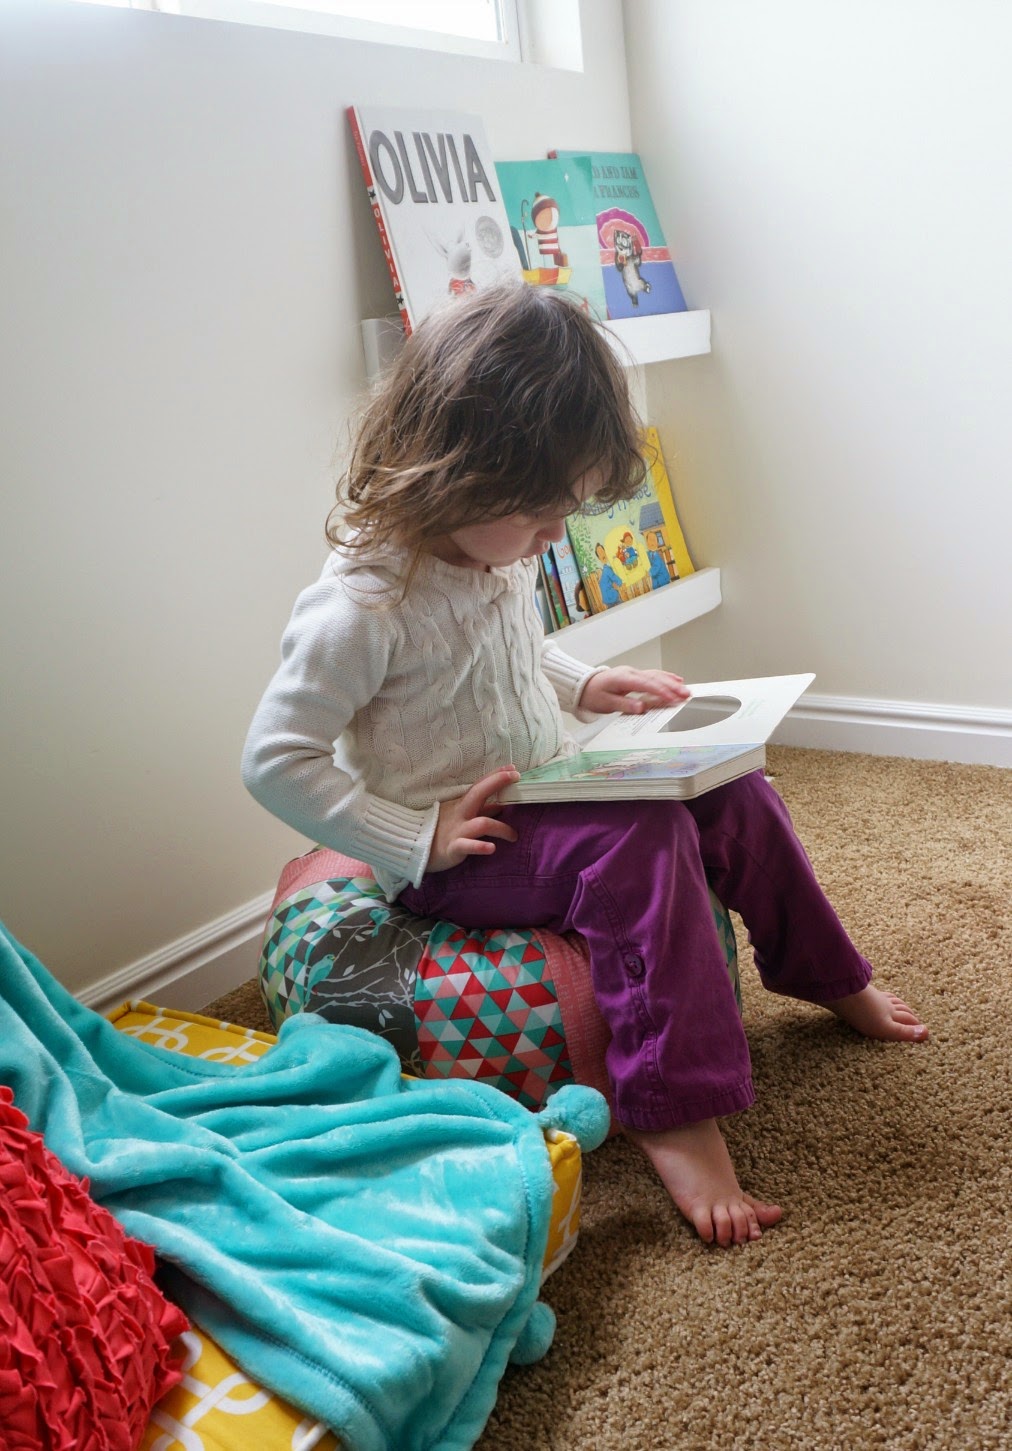
This reading nook is such a fun spot. The pouf was made using pattern pieces I designed and cut out with the Cricut. Just sew them together and stuff and it’s a fabulous place to sit and read.
See?
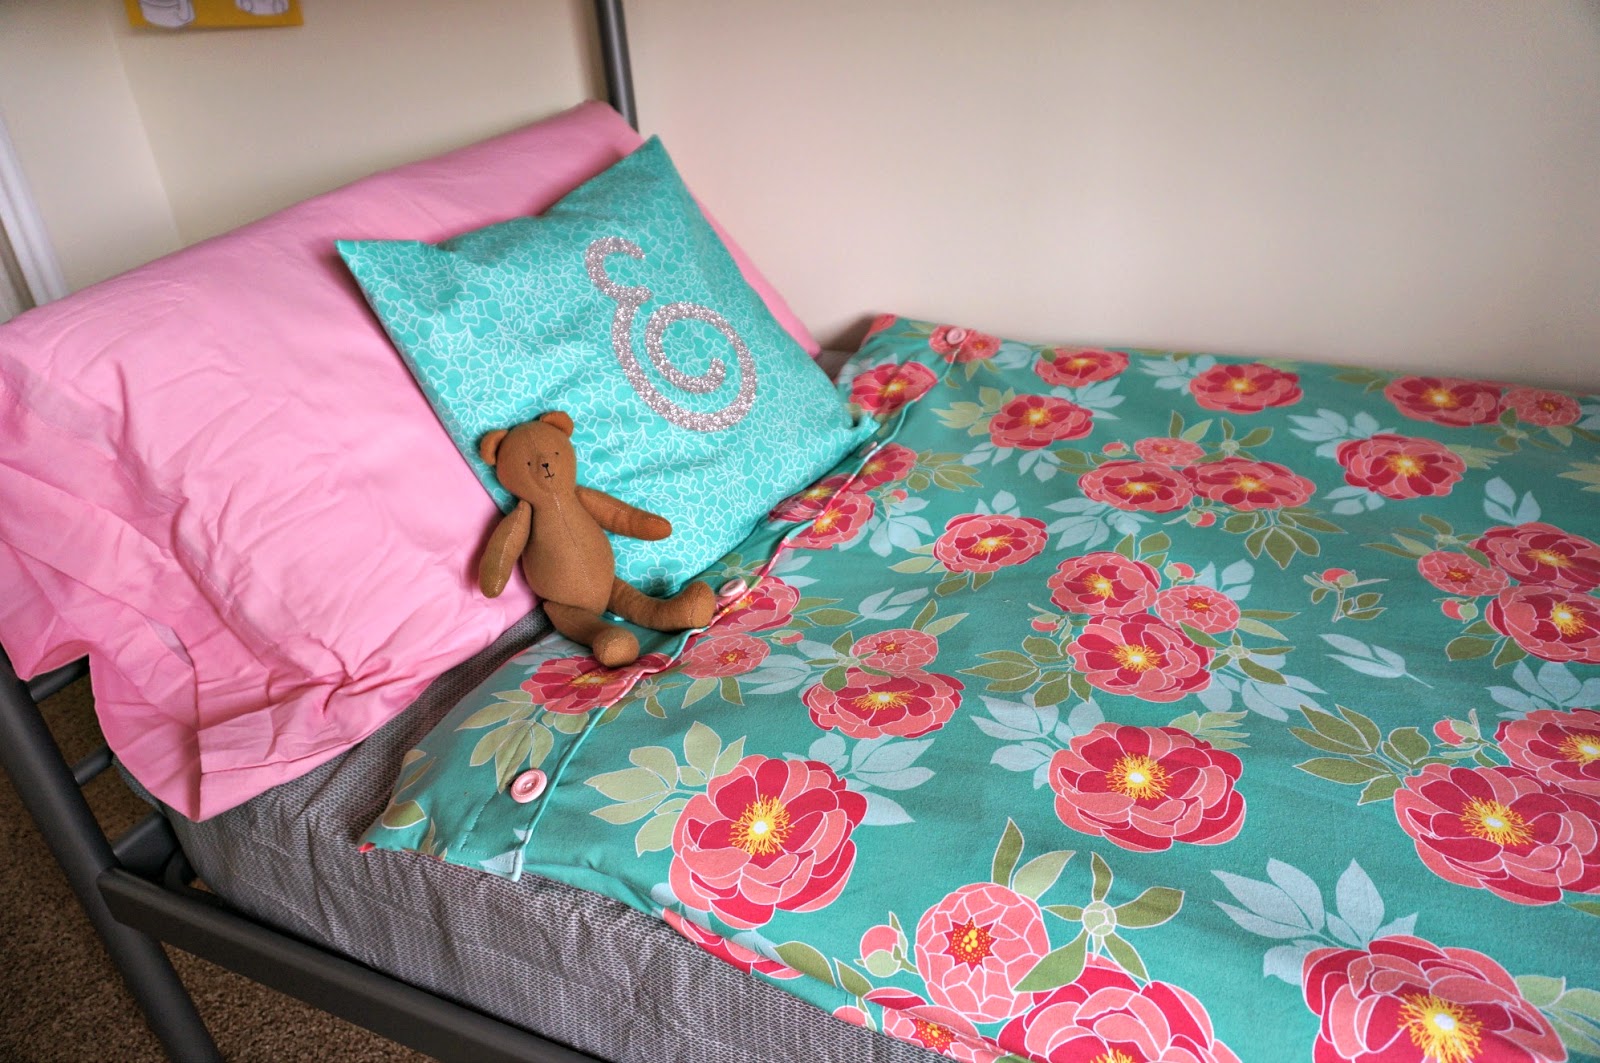
This is a closer look at the duvet covers I designed, I wanted them to sit on the mattress so my girls, who are 6 and 2, could make their own bed and not have to try to stuff a large comforter into the sides of the bunkbed. You can also see one of the monogram pillows I made. The iron on glitter is so much fun to work with.

One more shot of the closet corner. I covered a white board with vinyl so it didn’t look so messy, also, since there is a 2 year old living in this room, dry erase markers were out of the question. I love how the vinyl mimics one of the fabrics in the pouf and still gives my kindergartener a place to display her beloved school work. You can also see the painted “I am a child of God” sign I made and hung above the closet. My girls love this song and I knew it needed to be part of the room.

I think this post is long enough, so I’m going to leave you with a parting shot of my flower art. Again, I will be posting tutorials on some of the more involved projects as the week goes on. Voting for the final round will begin Monday, Feb 2, so be prepared for major spamming next week. 🙂
**Edited to add** Voting is LIVE!! Please head over and vote for my room! https://www.facebook.com/OfficialCricut/app_181518015386164
mobile friendly link: http://bit.ly/1JPMMfi
Here’s a run down of how I spent the money:
Ikea- $250- storage containers, bunk bed, pillows, covers, curtains and rod
Walmart- $60- sheets, pillow cases, misc hardware
Target- $100- pillows, throw, decor
Home Depot- $200- wood for closet shelves and book ledges, paint, primer, misc hardware
PoppySeed Projects- $100 frames
Fabric- $80 (does not include knit for duvet covers, provided by Riley Blake Designs)
Michaels- $30 paint, craft supplies
Grand Total: $820
Phew! That’s a lot more money than I usually spend. I am so very grateful for Cricut and the opportunity to participate in this contest- it has been a tremendous experience and I have learned so much. This makeover never would have happened without their support.
Thanks so much for taking the tour with me!
XOXO,
Amy
linked up to Show and Tell Link Party!


Karen
January 29, 2015 at 12:44 amI am TOTALLY in love with the vinyl on that white board thing! I see some projects in my future… or your future 🙂
Congrats, it's amazing. I knew you'd kill it!
Amy @ The Happy Scraps
January 29, 2015 at 1:31 amThis is amazing Amy! I love it all, but I especially love the gallery wall and the pillow pouf. Great Job!
Gwen @ Gwenny Penny
January 29, 2015 at 2:57 amFan-freaking-tastic, Amy! It looks absolutely amazing. You worked so hard on this, and it's so nice to finally see it all. My favorites are the marquee and the flower art. Love it!
Leanne
January 29, 2015 at 7:14 amWhat a sweet room! I love everything about it. All the bright colors and personal touches are so you!
Kara
January 29, 2015 at 2:21 pmWow Amy, it turned out amazing!! I love all the fun colors,and of course your sewing skills are crazy. I think my favorite it the Dream sign that doubles as a night light. So cool!
Kristie
January 29, 2015 at 3:18 pmLove the Roman shade. I need to make some like that for my kids rooms. To windows in each room. Ugh.
I love what you did. Can't wait to read how you did it all.
Ronda Batchelor
January 29, 2015 at 6:49 pmCute, cute cute!! I love the colors and patterns. I am working on my other daughters room and it's very similar colors. Thanks for sharing!!
Amanda Coleman
February 2, 2015 at 10:44 pmThis room makeover is so much fun! The pouf immediately caught my eye. How neat that you made that with your Cricut, too! Let me know when the pattern becomes available. 🙂
Theresa
February 4, 2015 at 9:03 pmSuper cute room. Love the paper flowers plaque! Theresa @DearCreatives