
Last week I promised I’d share how I made my paper plate baskets. Well, even though it’s not the next day- here it is. 🙂
As I mentioned in the previous post, I had first seen these baskets on a pin that linked to this tutorial on Sara Hearts. She had first seen them in a Martha Stewart magazine, but when I looked online I couldn’t find the tutorial. I had a different take on how to put them together, so that’s what I’m going to share today.
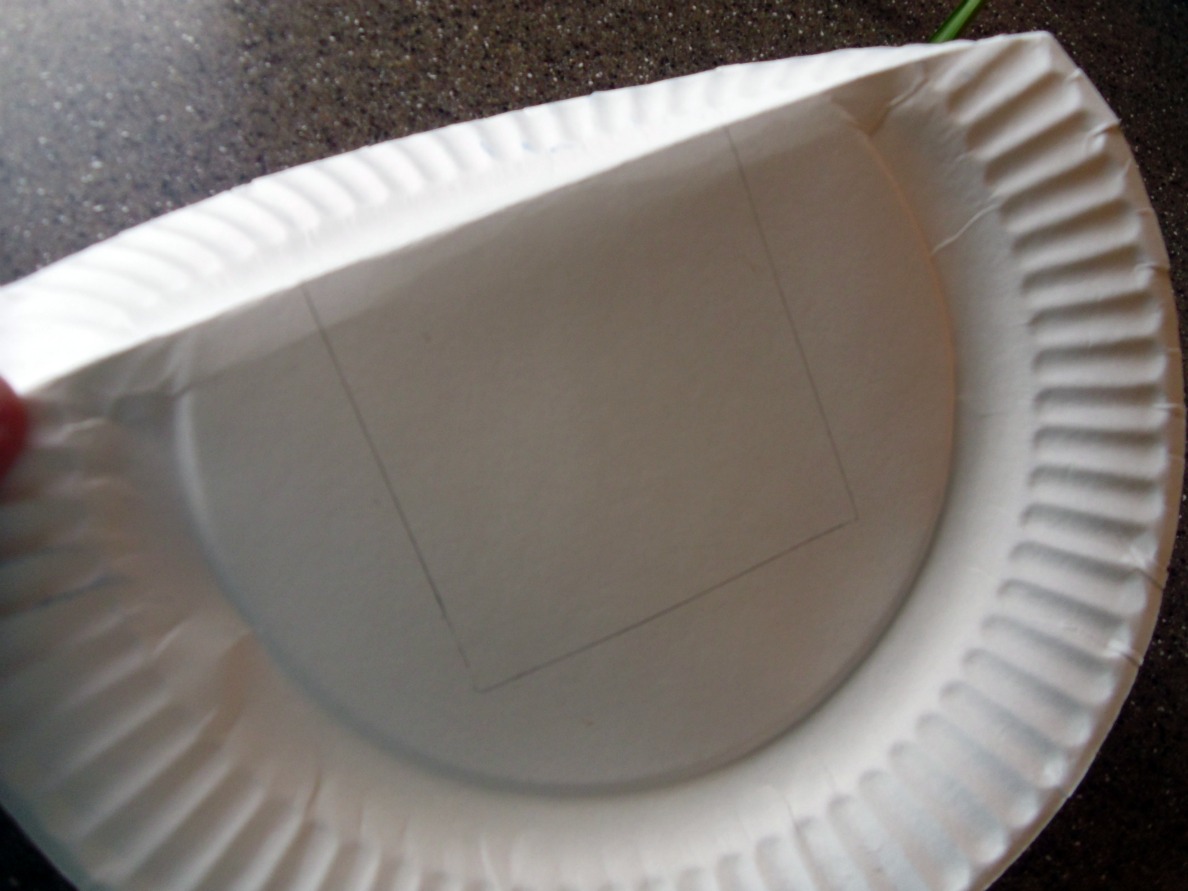
To start you will need a 9″ paper plate, a 3″ square template (I just cut out a 3″ square out of cardstock), and a stapler or hot glue gun. Optional: embellishments, ribbon, ink.

Trace the 3″ square onto the center of the plate. You can measure in 3″ from the side to get it exact, but if you’re fairly close, the basket will turn out fine without being precise.
Fold over each side of the square, continuing the fold to the edges of the plate.
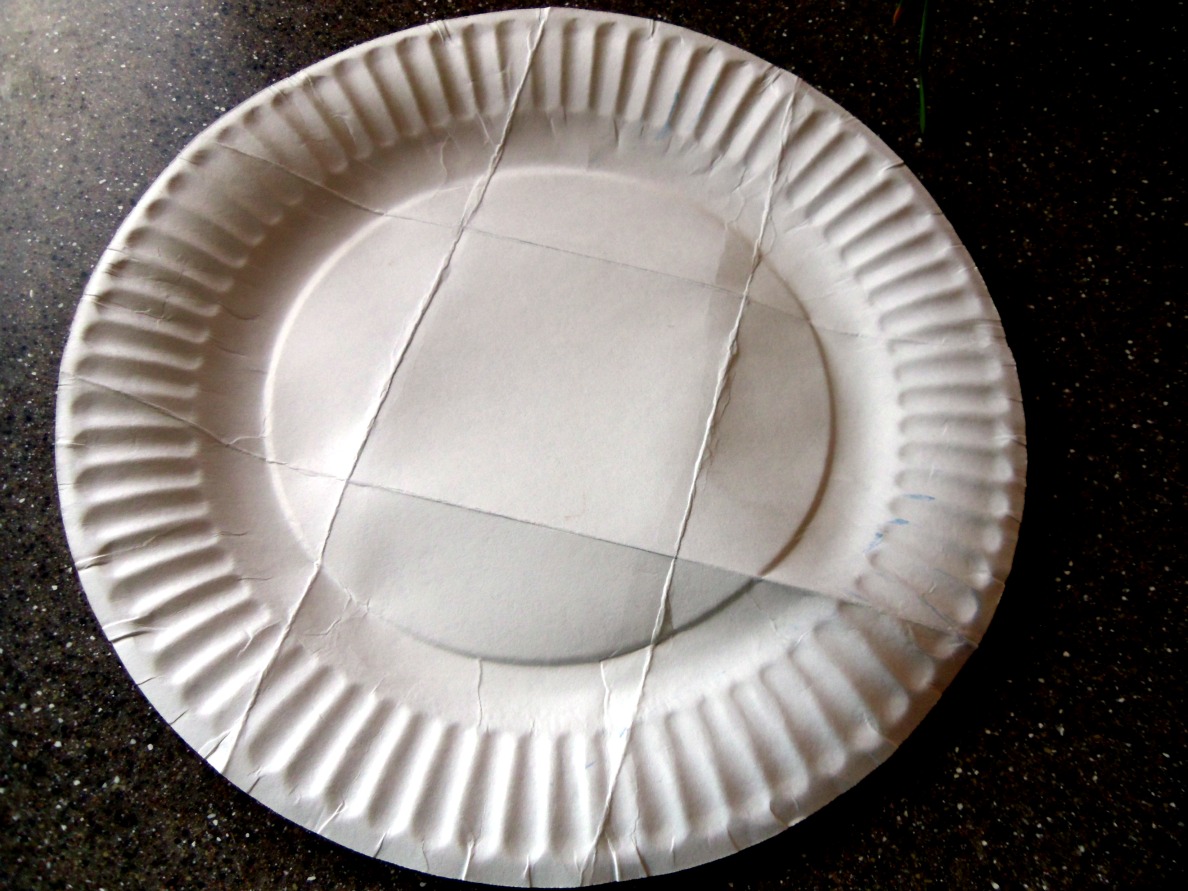
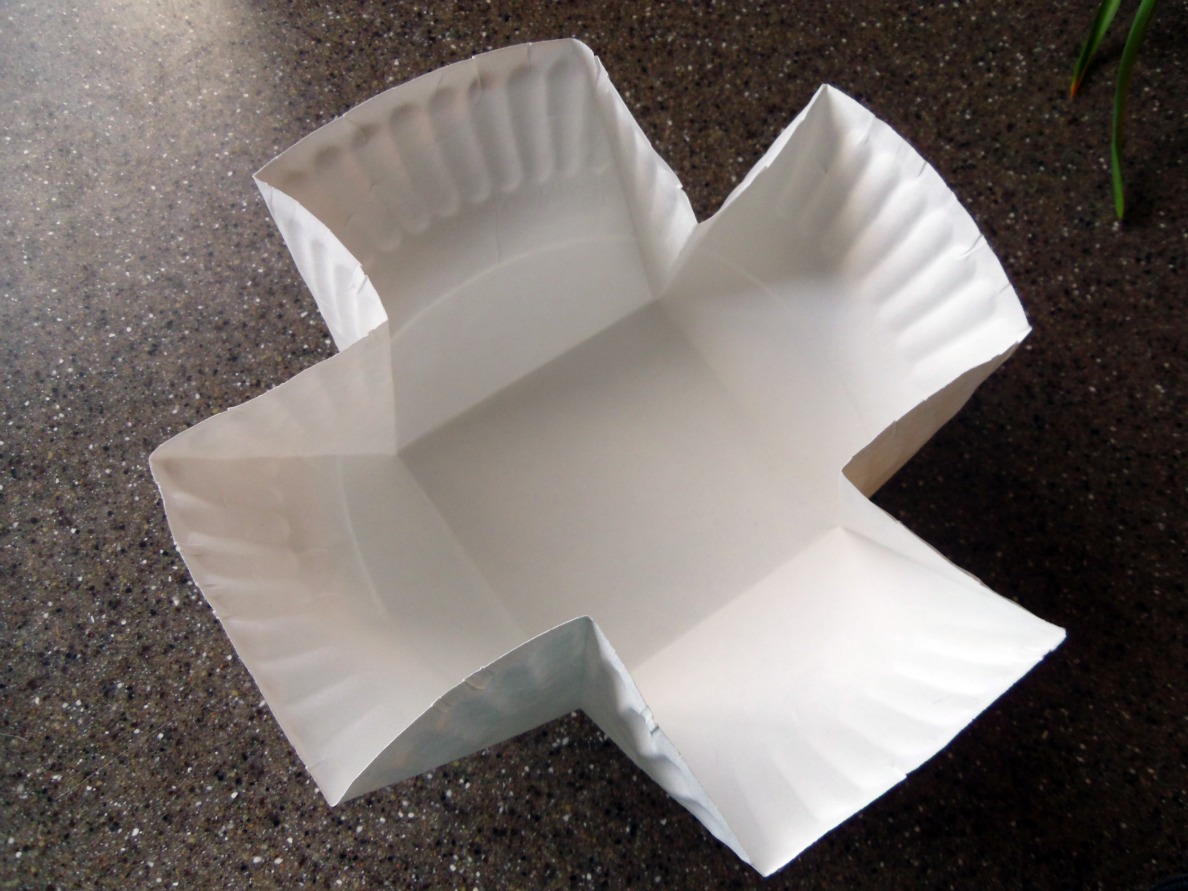
This is what your plate will look like when all four sides are folded.
This part gets tricky to explain in words. We are going to fold the triangle piece in half, lining up the two straight sides to put the crease in the center of the triangle.
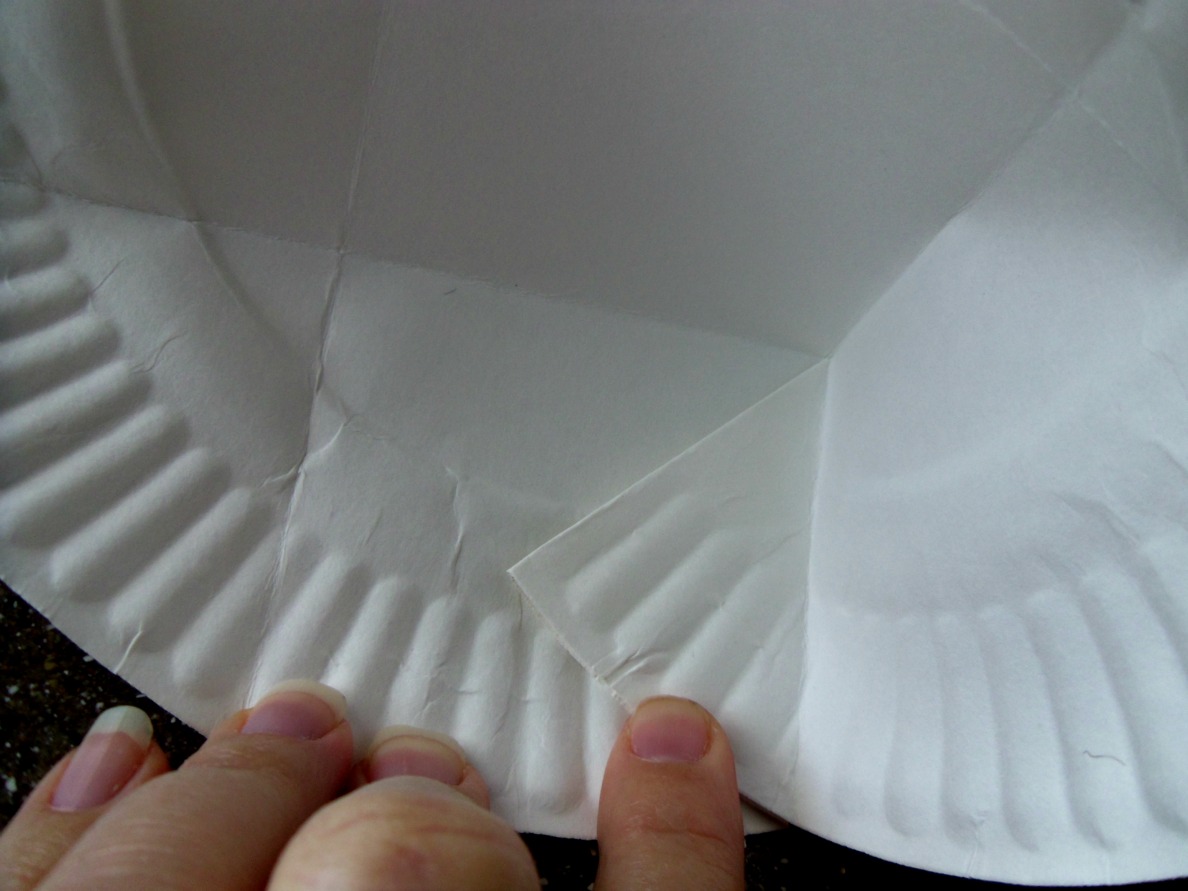
Fold it flush against one of the sides. Repeat with all four triangle pieces. The important thing to remember is to keep the outside edges lined up the whole time so the basket is square and the corners are flush.
This is what you will have when all four corners have been folded. If you want to ink the edges, or color the sides (like we had the cub scouts do) you will want to do it now. Next we’re going to create the basket. There are two ways to do it, you can staple the corners to the side, this way is quick and fast and very simple. When you are finished you can just cover the staples with a ribbon or other embellishment. The other option is to use hot glue, which will seal up the edges a bit better and leave no external marks, but is just a tad more time consuming.

This is the stapled version. You will want to make sure you keep the staples lined up pretty closely so when you add ribbon (or the very popular washi tape) you will cover them up.
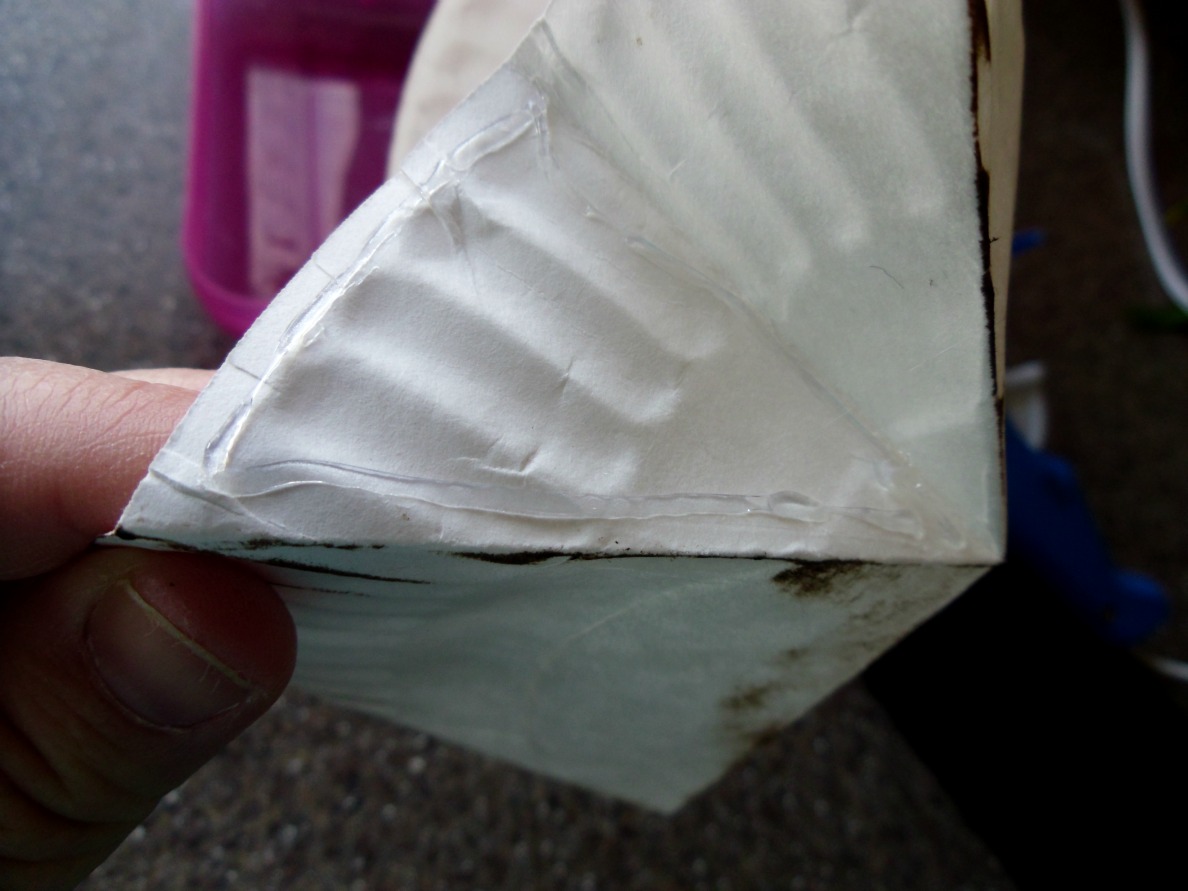
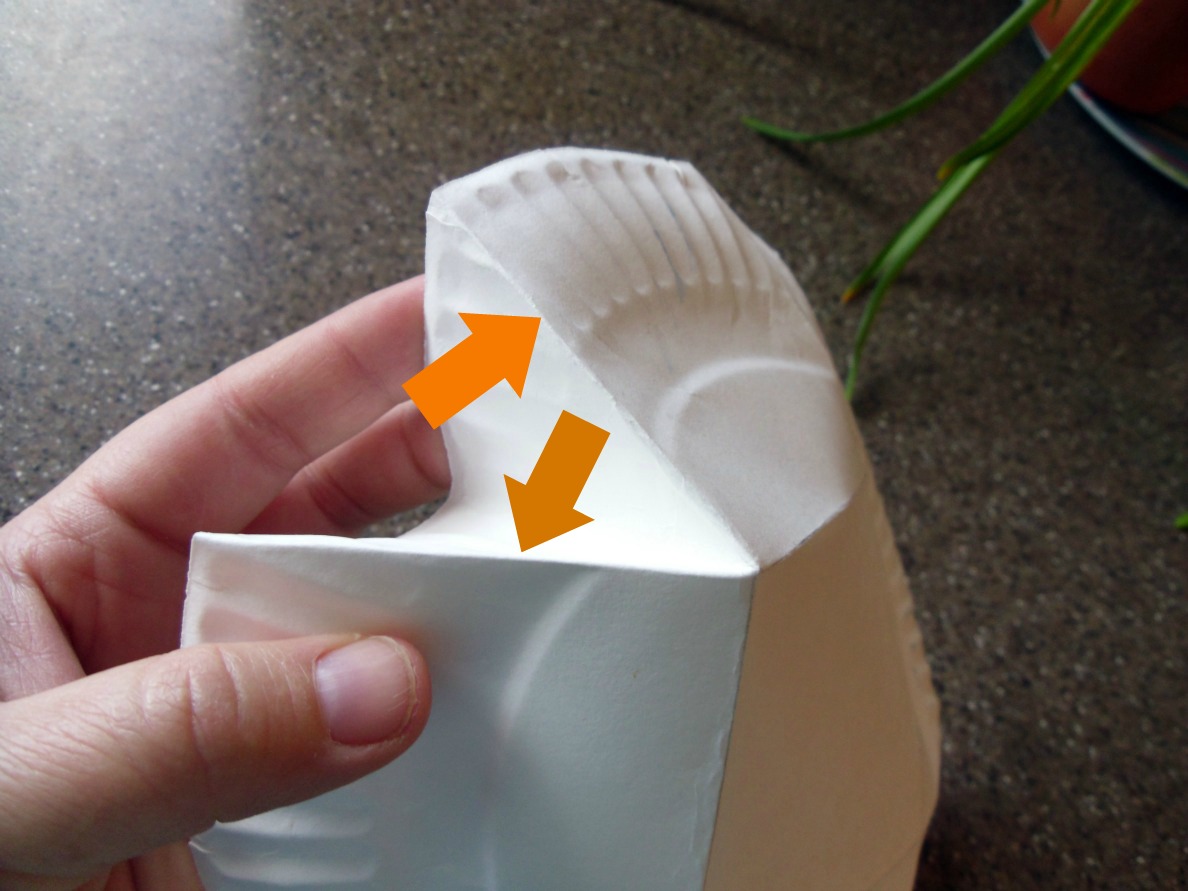
To use hot glue, you will run a bead of glue around the border of one half of the corner triangle then pinch the corner shut. Make sure you line up the sides again so your corner is flush and square.

To tack the corners down, you will need to add a dab of glue to the points of the triangles (note the arrow in the picture) and press them against one side. It’s a much cleaner look, but I personally prefer the simpler staple version. 🙂
To finish it off, add a ribbon to cover the staples (if that’s what you used), or embellish to your heart’s content.
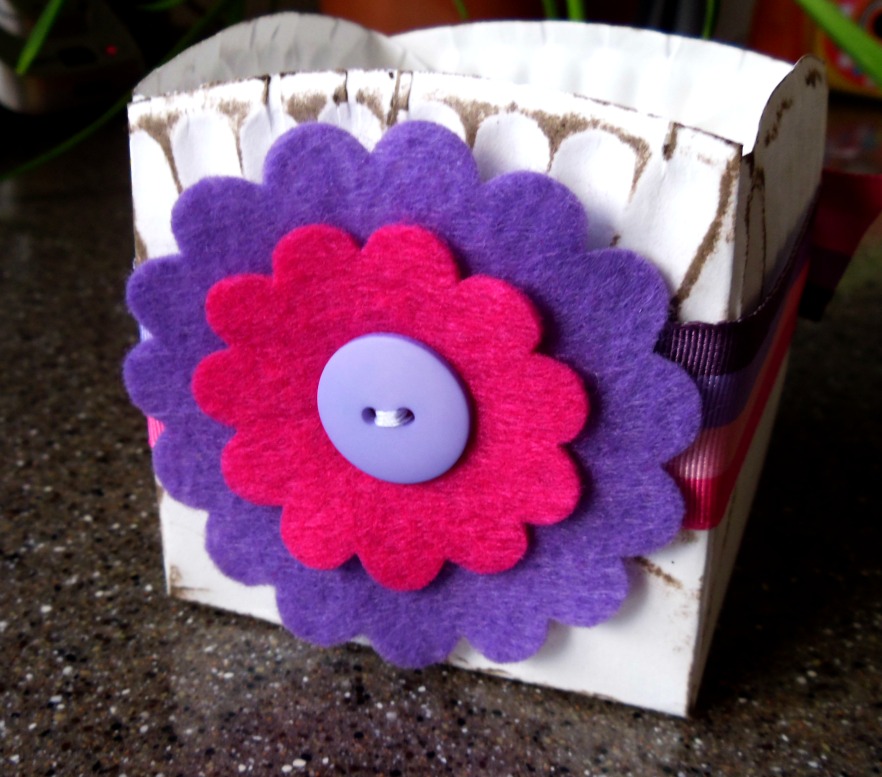
You don’t need to do much to these to make them darling, their size is enough to endear them to any recipient. Fill them with cookies, treats, notes, berries or other fun small items and gift them to a neighbor, friend or teacher. Cute and inexpensive.
You can see what we did with them in our Cub Scout den here.
Let me know if you have any questions or if something isn’t clear. I’ll do my best to help.
xoxo,
Amy
Linked up to the Weekend Wrap up party at Tatertots and Jello. Look What I Made Link Party at Kara’s Creations.


Lacie
March 15, 2012 at 3:28 pmCute!
Leanne
March 15, 2012 at 4:50 pmThis is too cute! I've been wanting to make some but still haven't. Maybe this week!
Kara
March 15, 2012 at 6:41 pmSuch a cute idea Amy! Can't wait to try it out! 🙂
Gwen @ Gwenny Penny
March 15, 2012 at 7:31 pmSo adorable, Amy! These have so many uses, too. Love them!
Anonymous
March 16, 2012 at 11:02 amWhat a great idea! I love how simple and useful they are!!
Claire
March 17, 2012 at 1:50 pmWow-you are so creativeFollowing you from T and J-stop by for a visit!
Staci J
March 19, 2012 at 11:33 pmI LOVE this cute little basket Amy!! I'm so making one:)
Michele Pacey
April 2, 2012 at 2:34 amWell that's just cool. Clever how they're folded up so simply into a box. This craft is giving me ideas… hmmm… Thanks Amy!
Amy
May 11, 2012 at 2:29 pmI'm playing major blog catch-up! These are so cute! I can think of so many uses for them! I can't wait to try them!