 This flower is a big, beautiful, lofty flower. The ruffles puff out and stand up- hence the name- get it? Oh, I’m so sad…
Moving on.
To make this flower you will need one ruffled strip of fabric and a piece of felt or other fabric to construct the flower on.
The length and width of the ruffle is up to you, but there are a couple of things to be aware of- first, it’s easier to cut some off than add some on- so make it a little longer than 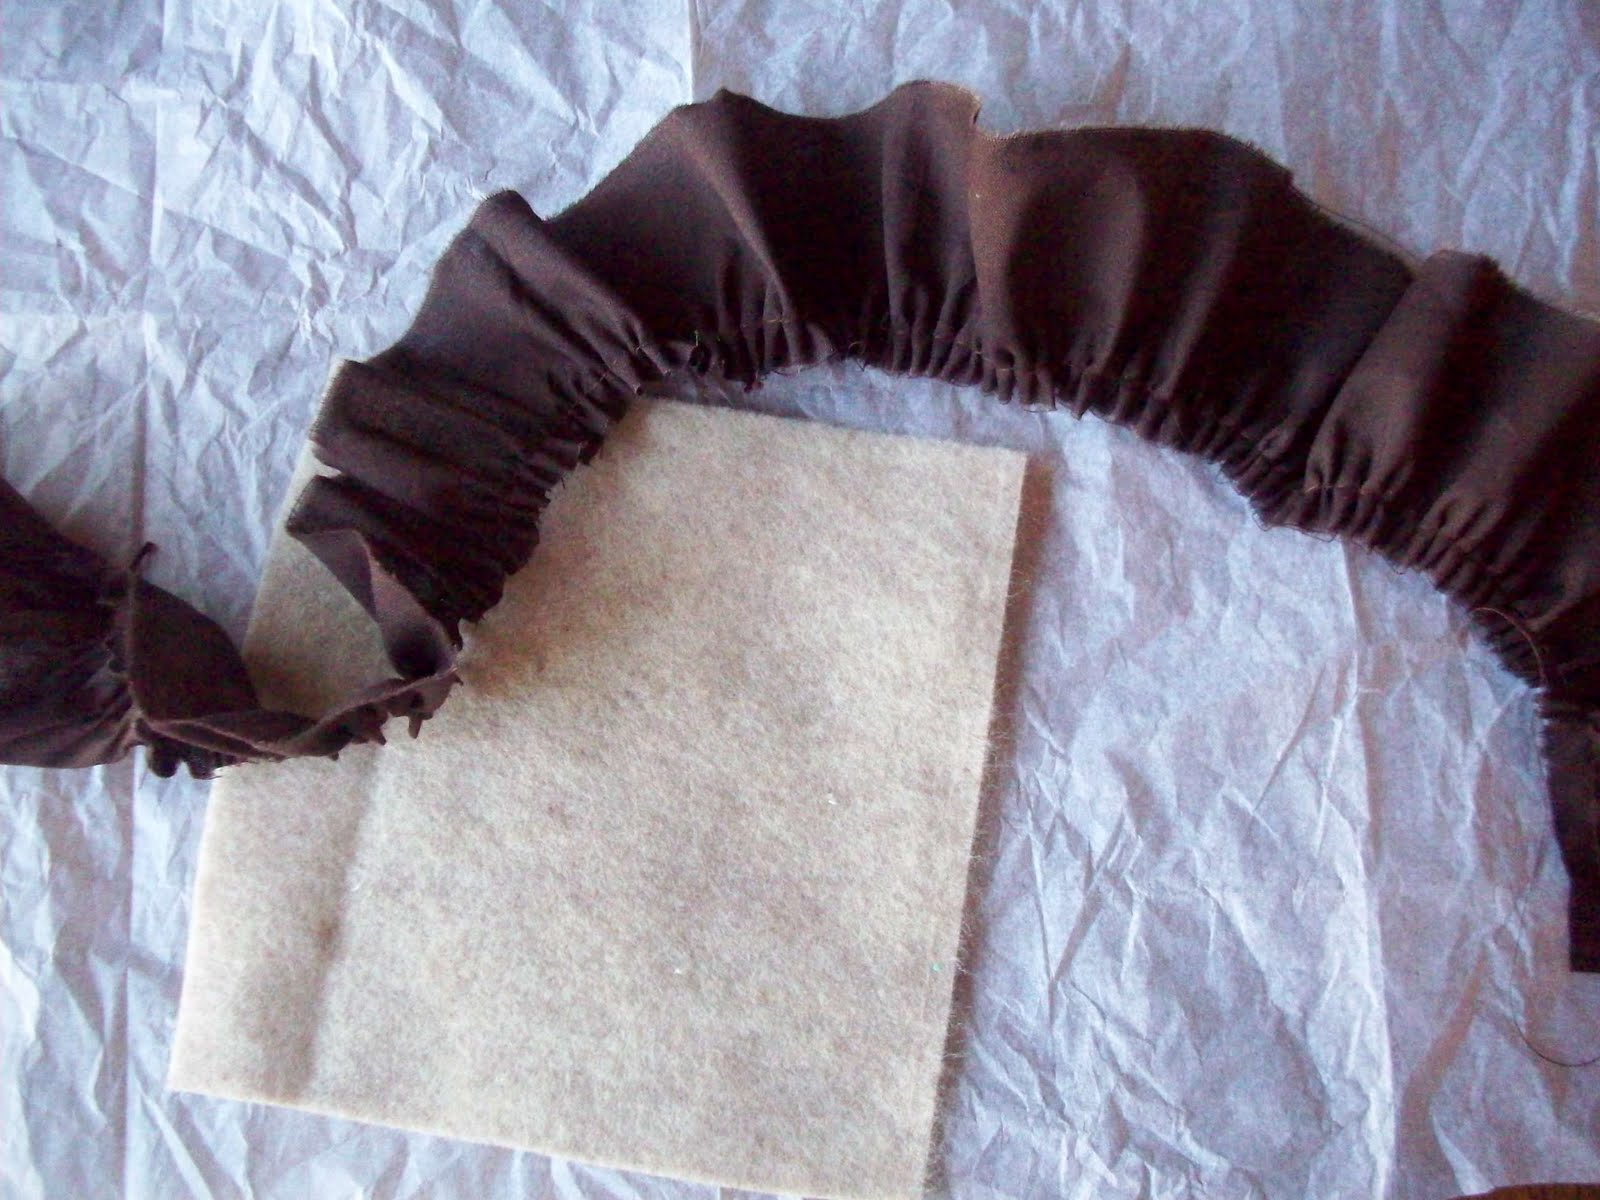 you think you’ll need. Second, the wider the strip, the taller the flower and the bigger around the flower can be. Again, it’s easier to take away than to add, so go a little wider than you think.
If you were making a flat flower, you would take your ruffle and lay it out nice and flat, sew it down, and then keep going until you filled in the center.

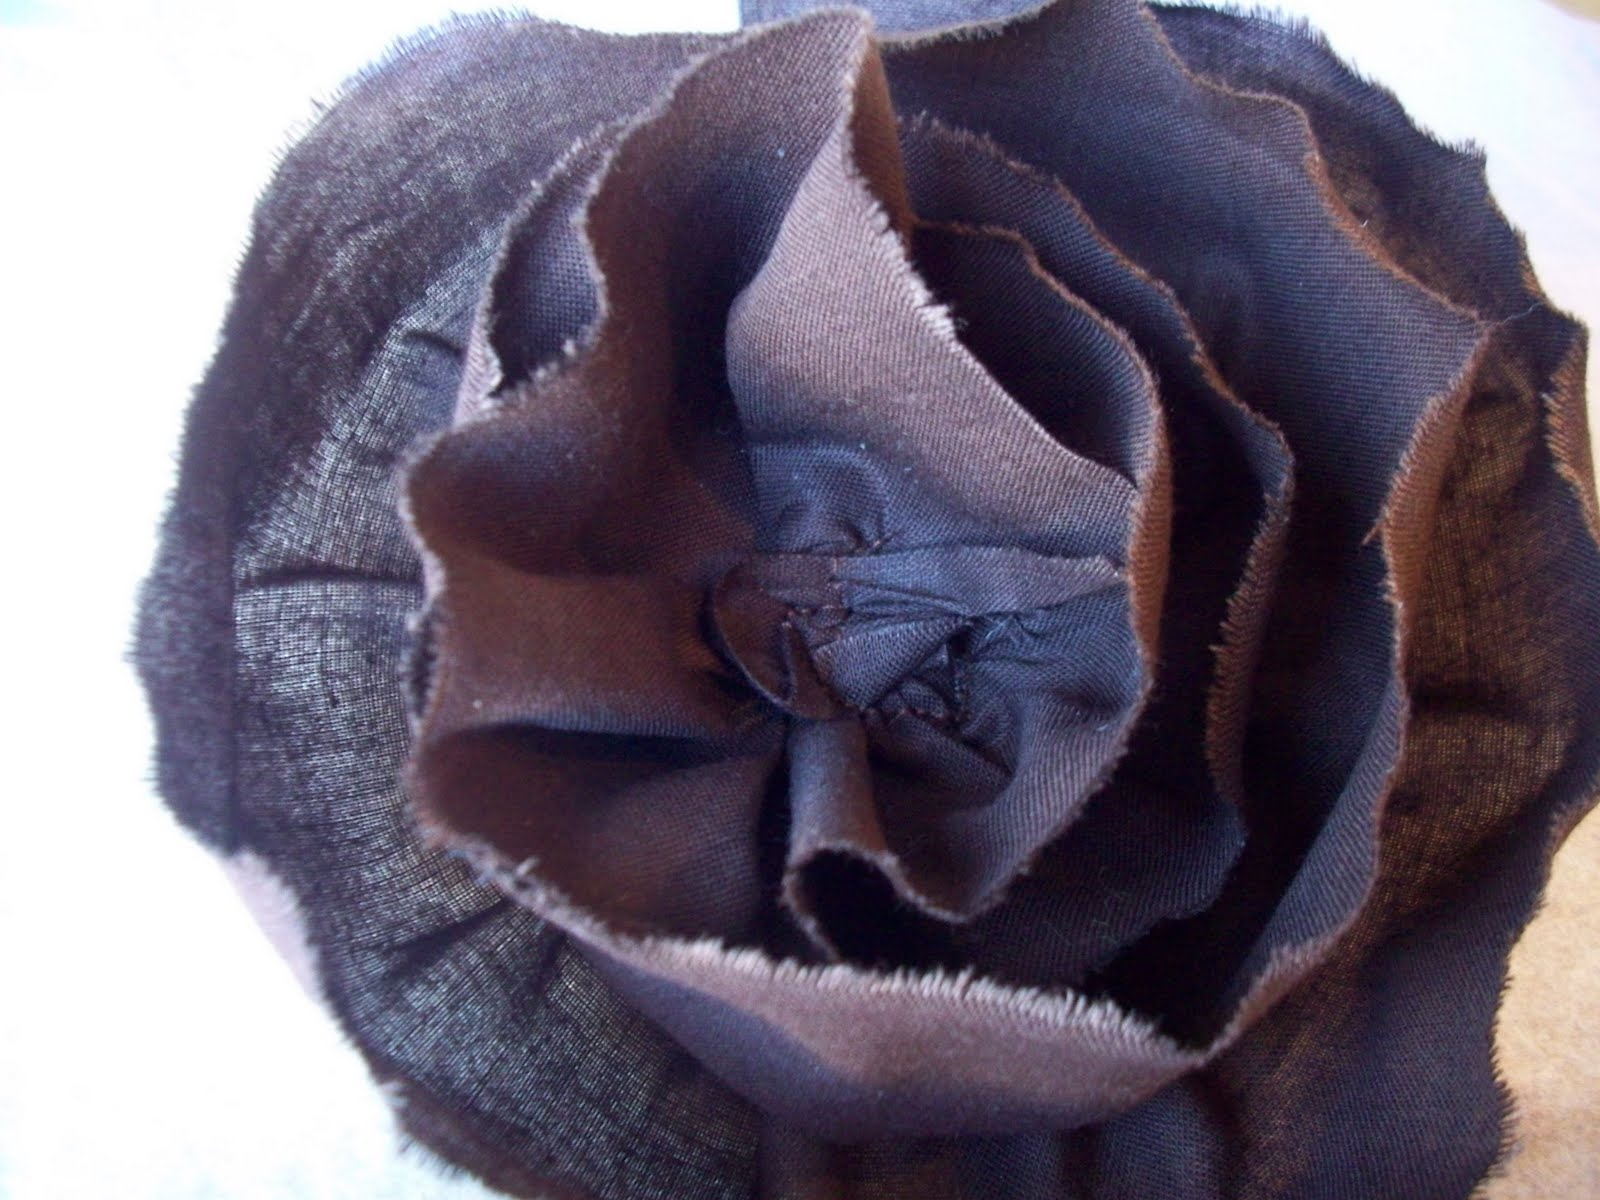
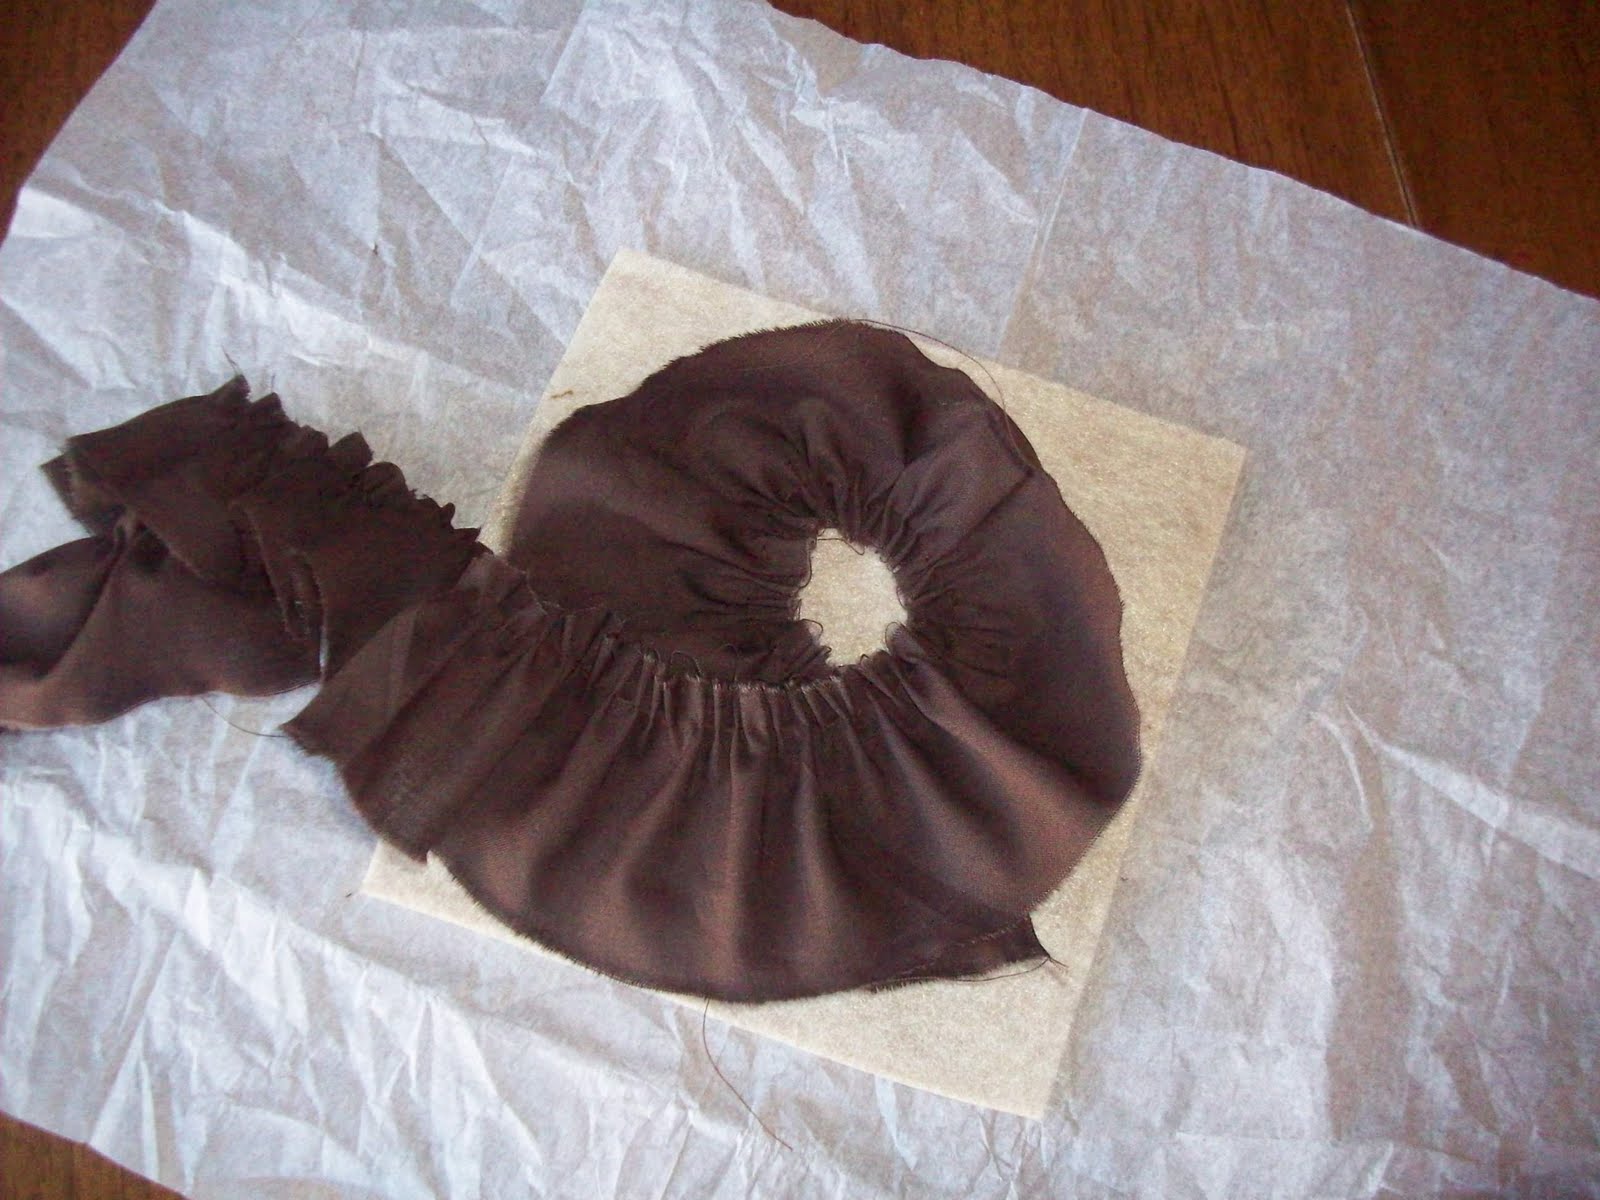 To start this flower, do the same thing, lay it out in a nice circle- and then pull the circle smaller. The edges will pull up. The tighter you make the inner circle, the taller your flower will be. This is really geometry in action- which is totally cool- the circumference of the outer circle is too small for the diameter of the inner circle (in their respective proportions) and so the fabric pulls up! Awesome- right? (did I mention I was THE nerd in high school?)
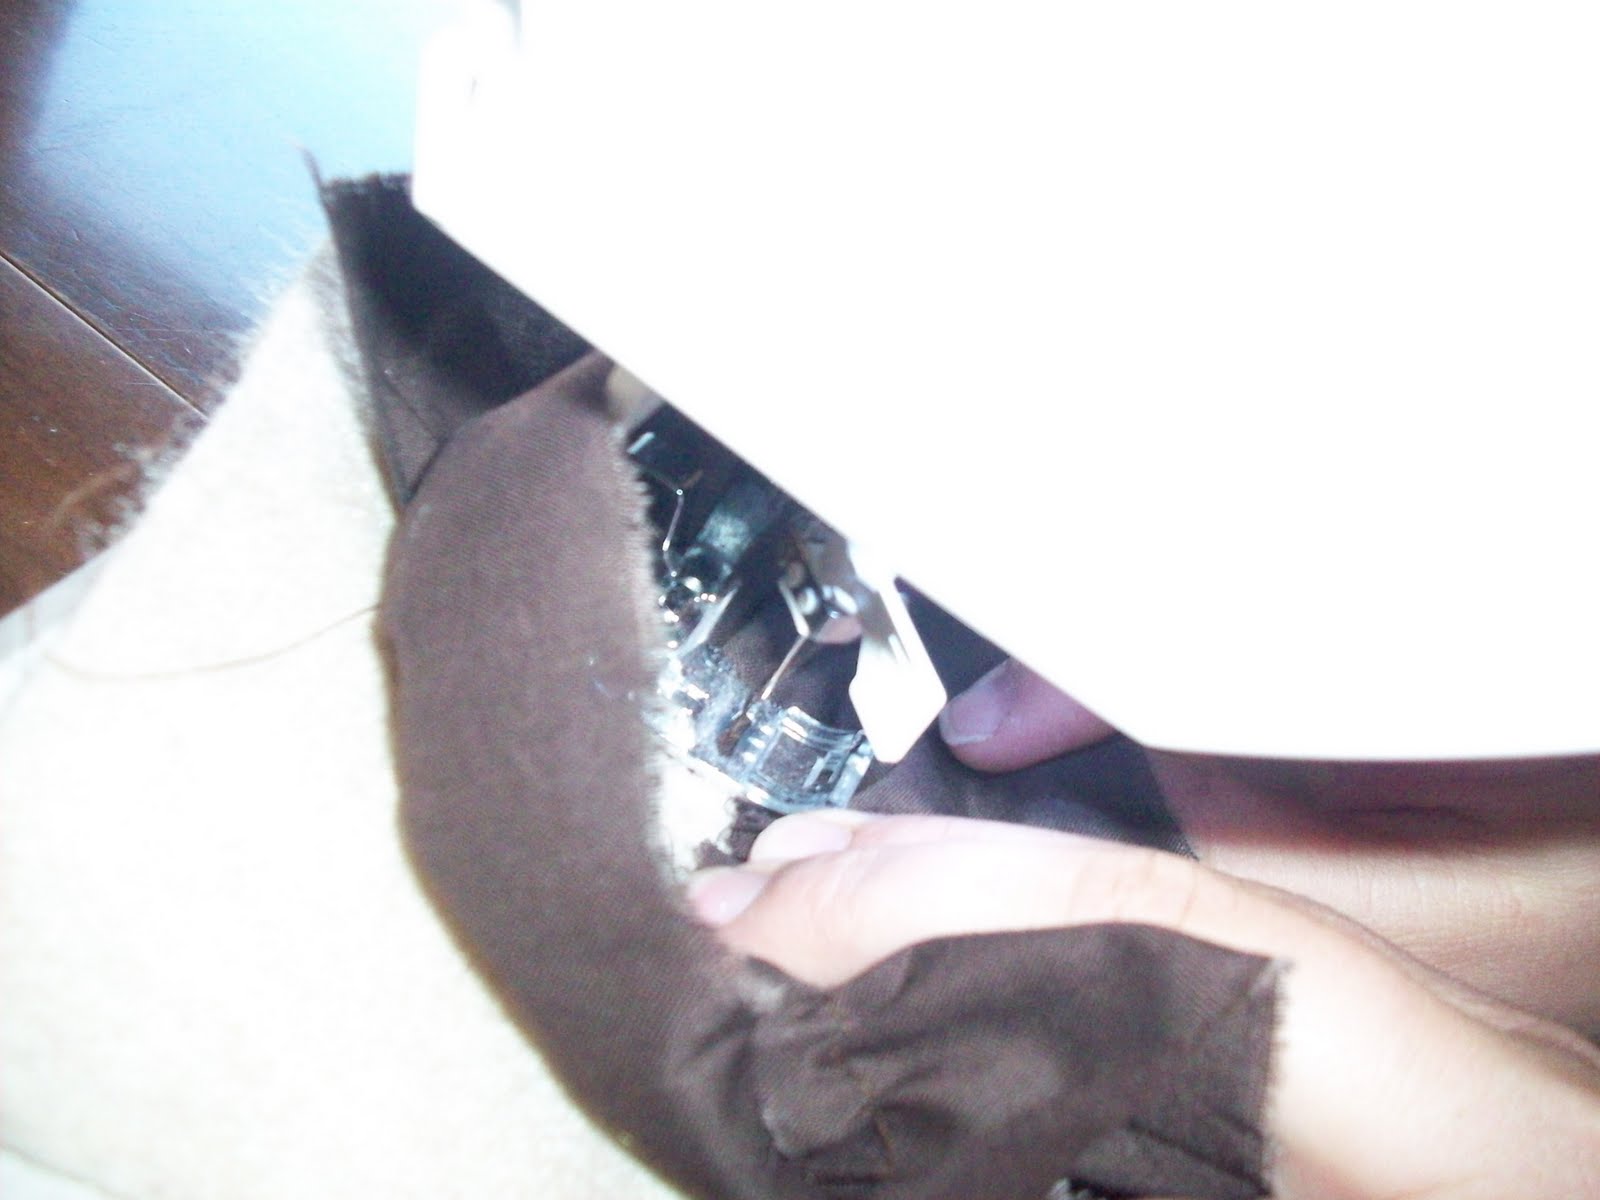 Annnnyway. Once you have decided how lofty you want the flower to be, I find it easiest to just start sewing. This can be a bit tricky since you’re basically sewing in a fabric cup and it can get hard to see. Just take your time and go slow. This is where the super neat feature on my machine that stops the needle in the down position comes in handy. Just keep going in circles- lower the needle, lift the presser foot and turn the base fabric, tucking the ruffle under- until you have filled the center of the flower. Take care that the layers are close enough to overlap just a little. I usually fold over the last bit and just sew it down so it covers the rough edges of the ruffle.
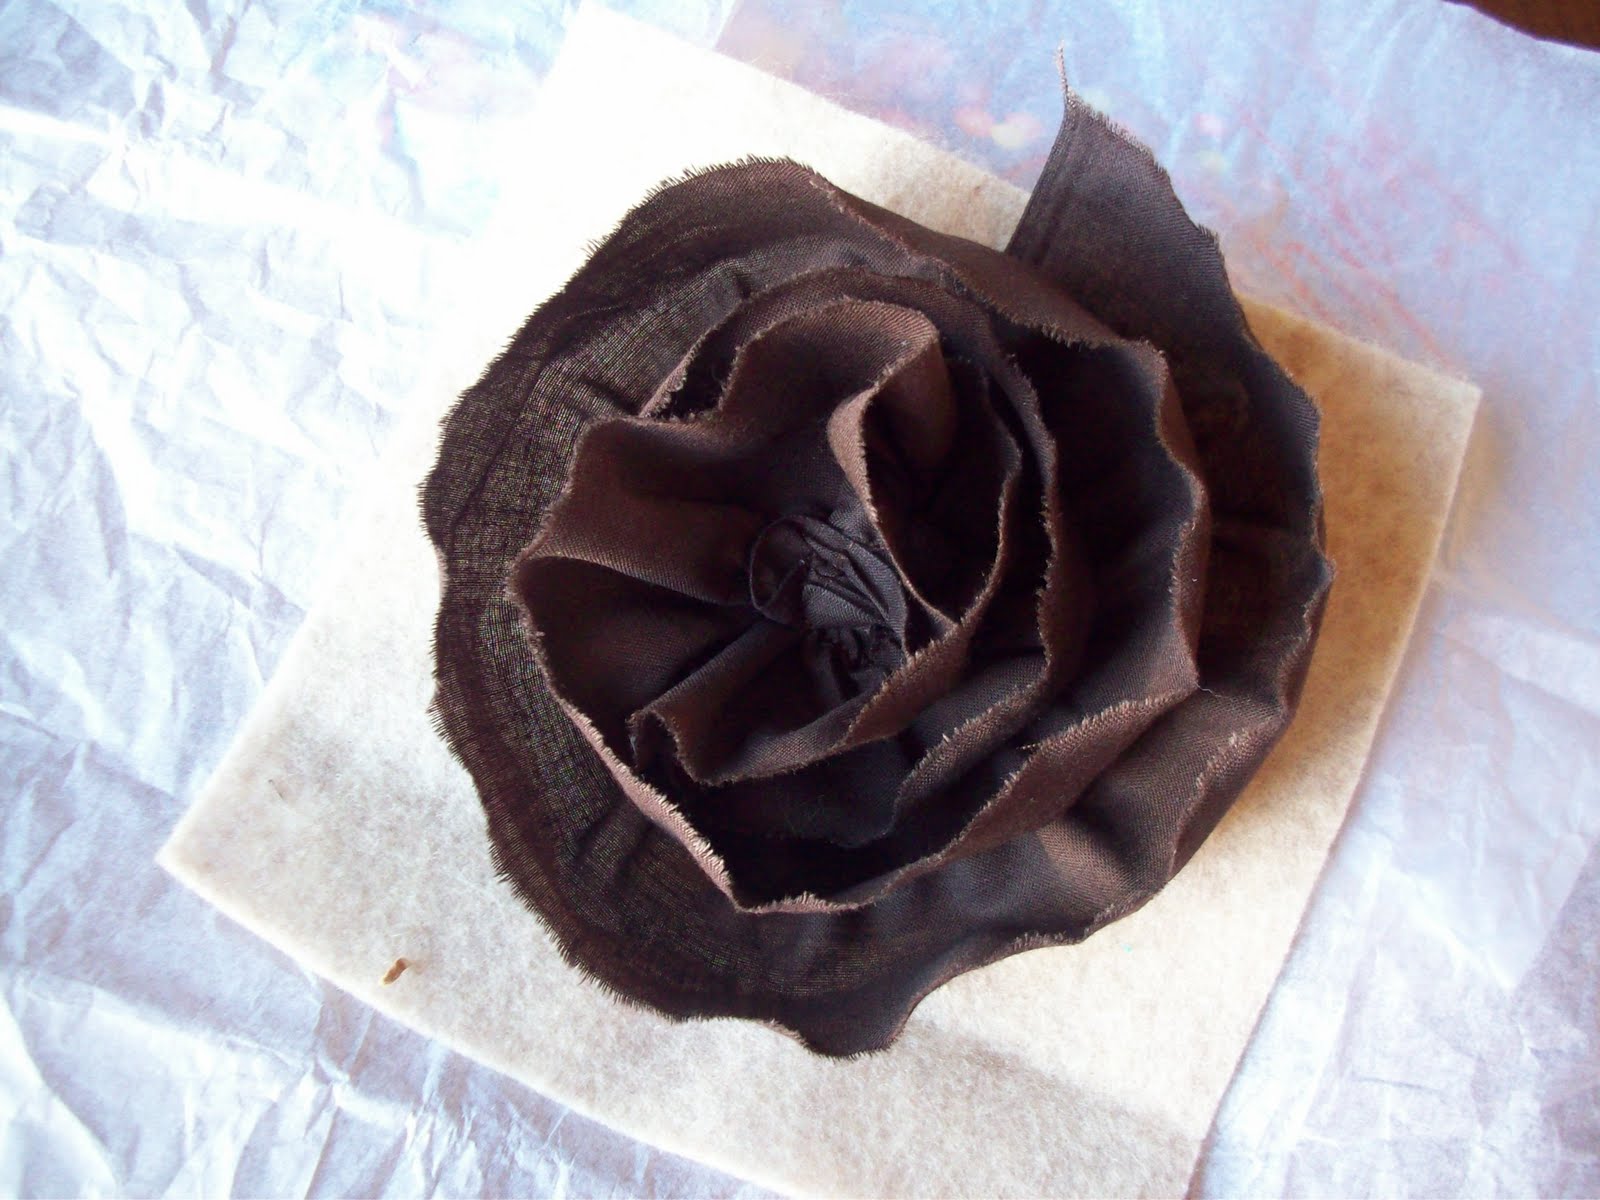 Trim off the excess base fabric. I usually just tack down the starting edge (but only the top corner) to the next layer of ruffle so it doesn’t stick out. If you find the flower is too tall for you, you can cut it down to the desired height now.
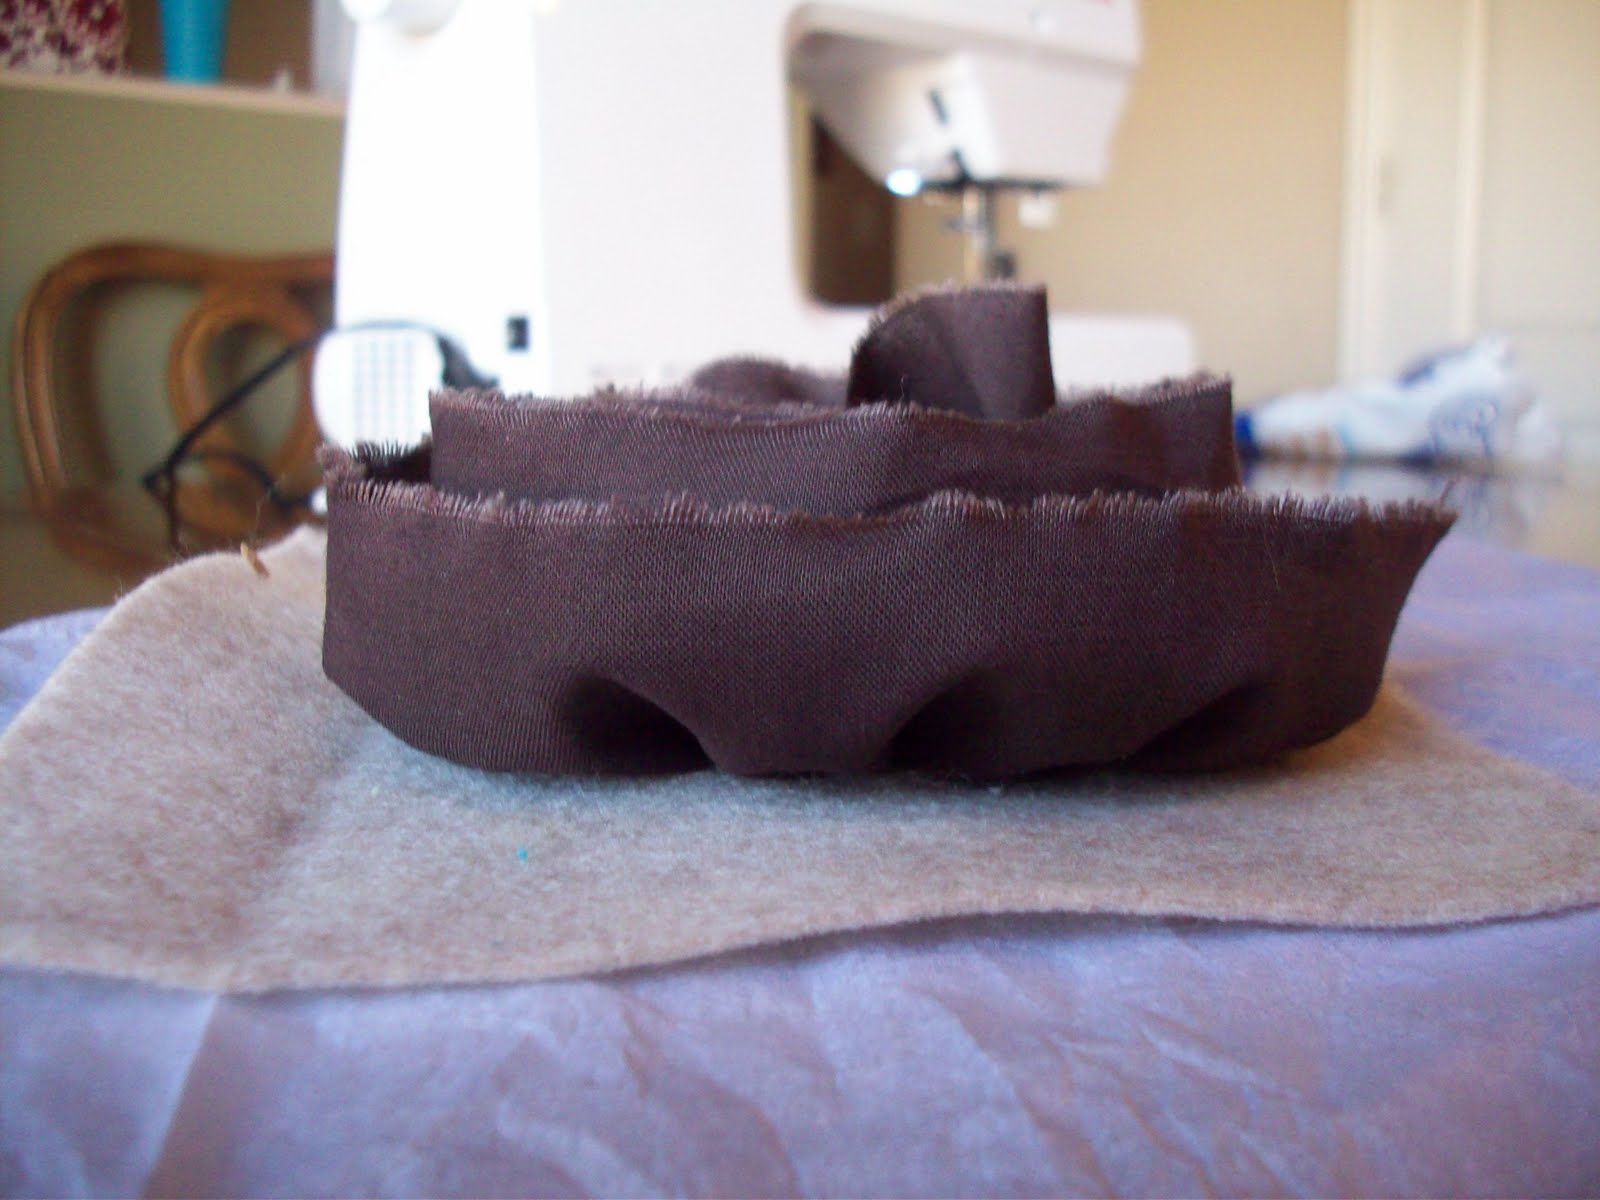
This is the view from the side. Lovely!
 Also linking up here at Someday Crafts


Gwen @ Gwenny Penny
October 21, 2010 at 2:48 amThanks so much for the how-to, Amy! These flowers are beautiful. I can't wait to try making some. Oh, and major math nerd here, so geometry gets me excited, too!
Spencer & Lorilyn Crum
October 21, 2010 at 11:01 pmLove your blog Amy! I kept sneaking in peaks at your page at work! Thank you so much for inviting me here! I am fo sho your newest follower!
Emilie
October 23, 2010 at 2:51 pmSo cute! And there are so many things you could do with them – love it!